Do you think IIT Guwahati certified course can help you in your career?
Introduction👮
Hey Ninja🥷! Today we will be dealing with how to build the requests in Postman. Postman provides a platform for API testing. It simplifies the lifecycle of an API. It also streamlines the collaborations so that we can create better APIs faster and more efficiently. So let’s see how to build the requests in Postman.
How to build the requests in Postman? 💻
We can connect to APIs(we are working with) by sending requests in Postman. Our requests can retrieve, add, delete and update data. Whether we are building or testing our API or integrating with a third-party API, we can send our requests in Postman. It can send parameters, authorisation details, and any body data that we require. E.g., suppose we're building a client application (such as a mobile or web app) for a store. In that case, we might send:
⭐One request to retrieve the list of available products
⭐Another request to create a new order (including the selected product details)
⭐A different request to log a customer into their account.
This is how to build the requests in Postman.
When we send a request, Postman displays the response received from the API server in a way that lets us examine, visualise, and, if necessary, troubleshoot it.
🔥Creating requests
Our requests can include multiple details determining the data Postman will send to the API(we are working with). It is straightforward. We just need to:
enter a URL
choose a method
then specify various other information optionally.
We can create a new request from the Postman home screen by using
New > HTTP Request or by selecting + to open a new tab.
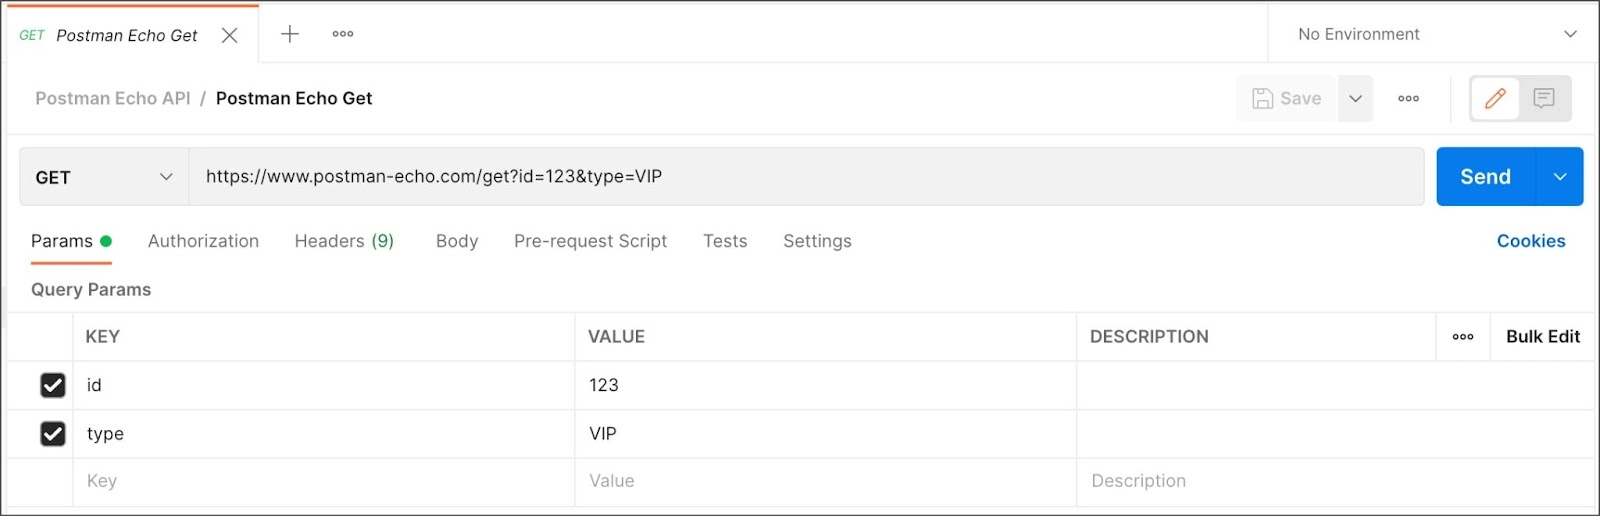
Select Save to create our request. We can give our request a name and description and choose or create a collection to save it.
Once our new tab is open, we can specify the details we need for our request.
Now we will add details of the request, which will give us more clarity on how to build the requests in Postman.
🔥Adding request detail
If we have a request we want to run, we need to know
the method
URL
other values(optional ) such as auth and parameters.
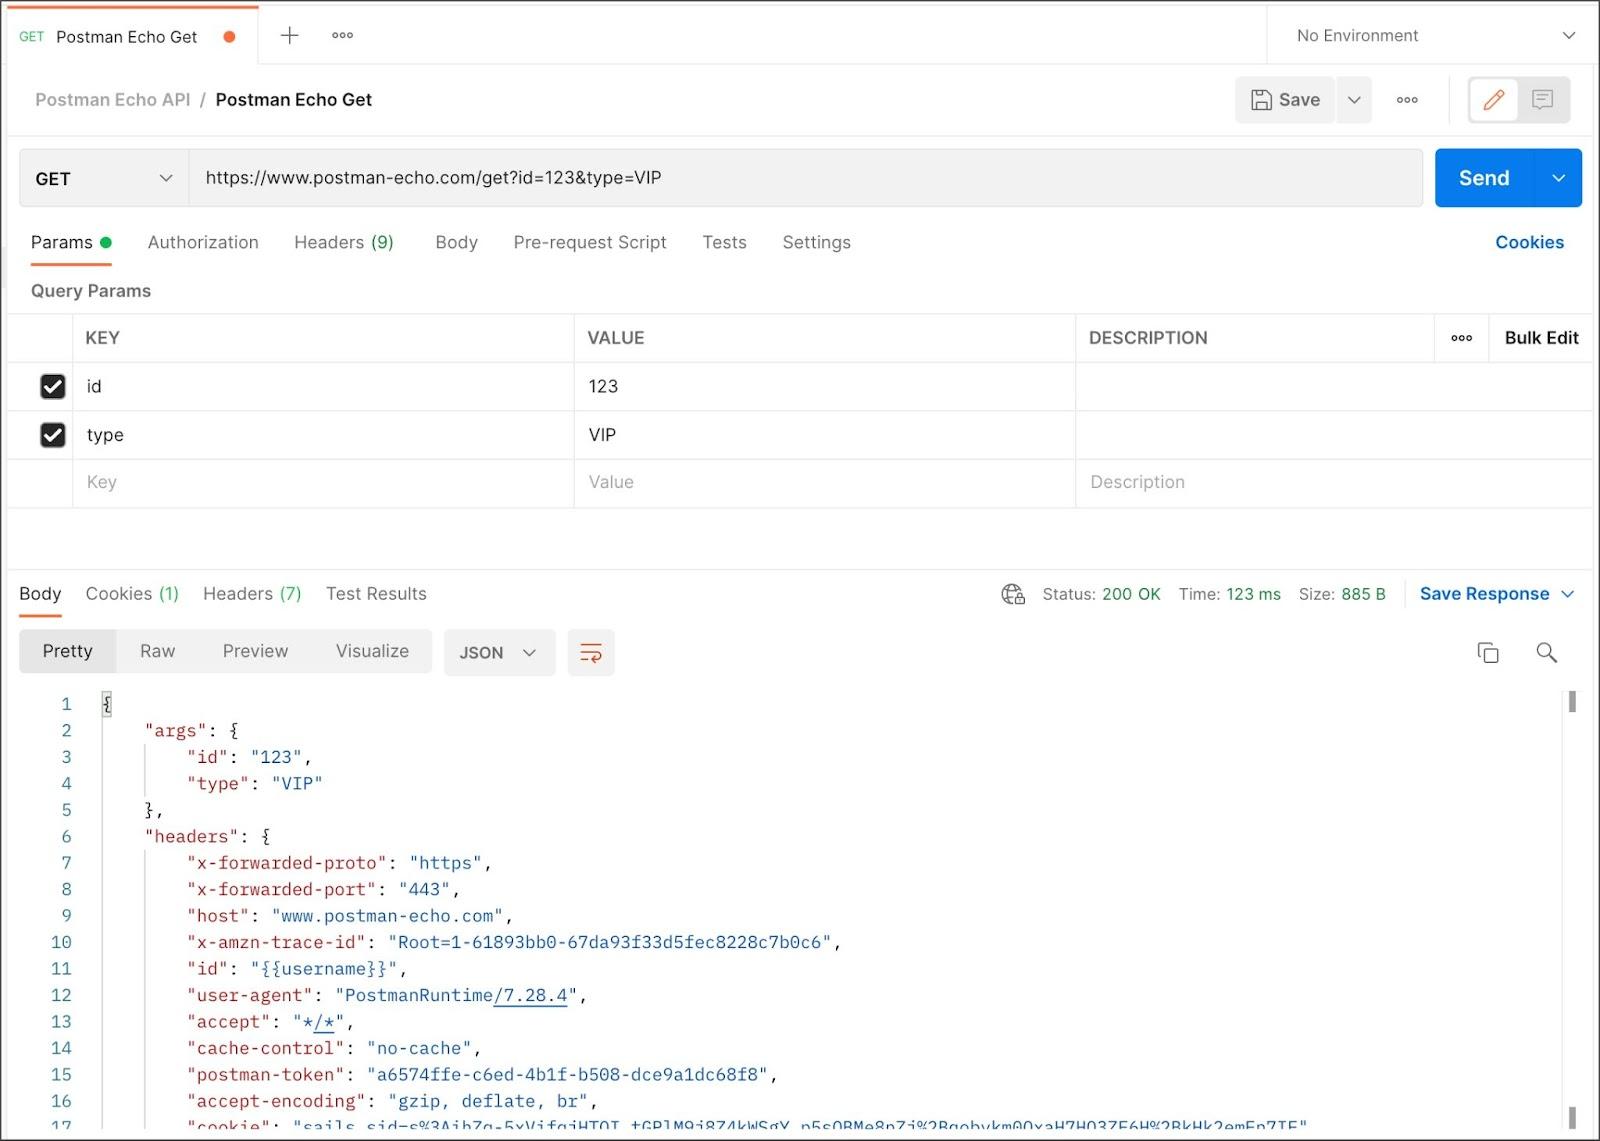
To test sending a request in Postman, we can set the URL
https://postman-echo.com/get
to the Postman Echo sample API endpoint and the method to GET, then select Send.
Open the Bootcamp in Postman and follow Designing and mocking APIs to import some requests we can use for exploring Postman.
🔥Setting request URLs
Each request we send in Postman requires a URL representing the API endpoint(we are working with). Each operation we perform using an API is generally associated with an endpoint. Each endpoint in an API is there at a particular URL. This is what we enter into Postman to access the API.
If we're building an API, the URL will typically be the base location plus the path. E.g., in the request
https://postman-echo.com/get
https://postman-echo.com is the base URL, and /get the endpoint path.
If we're using a third-party API, our API provider will supply the URLs we need, for example, within their developer documentation.
When we start typing in the URL input field, Postman will present a dropdown list of previously used locations we can use to autocomplete. Postman will automatically add http:// to the start of our URL if we don't specify a protocol.
We can optionally enter query parameters into the URL field or type them in the Params tab. We can enter them directly into the URL field if our request uses path parameters. We can use next-generation URL encoding in our requests.
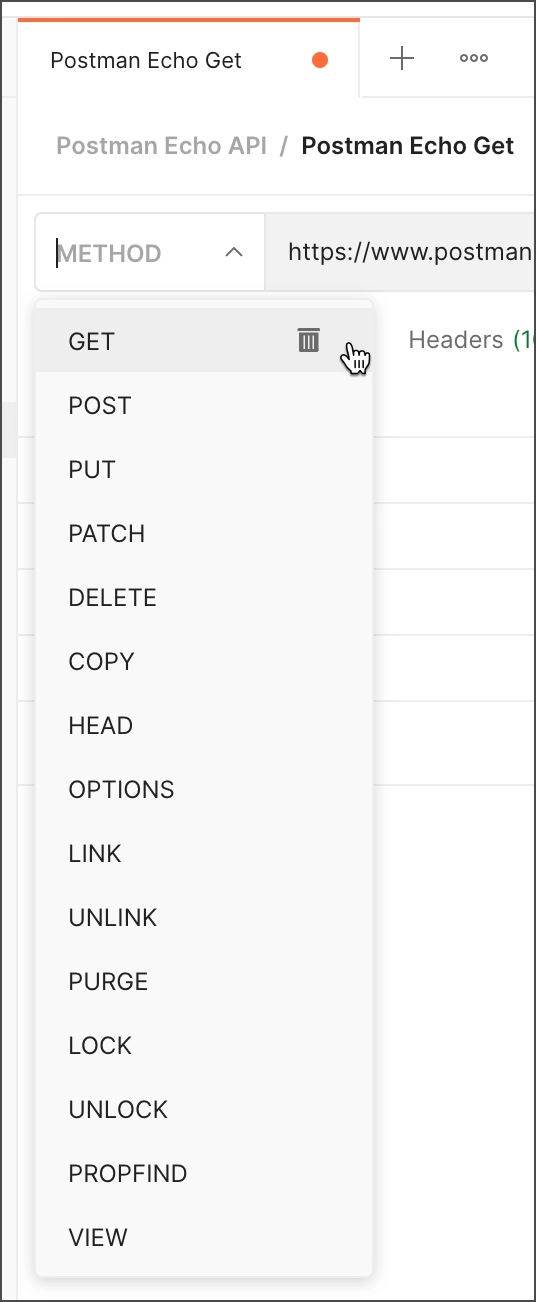
🔥Selecting request methods
By default, Postman will select the GET method for a new request. GET methods are typically for retrieving data from an API. We can use a variety of other ways to send data to our APIs, including the following most common options:
POST — add new data
PUT — replace existing data
PATCH — update some existing data fields
DELETE — delete existing data
E.g., if we're working with an API for a To Do list application, we might use
a GET method to retrieve the current list of tasks
a POST method to create a new job
a PUT or PATCH method to edit an existing task.
Postman supports several additional request methods by default, and we can use custom methods. Select the method dropdown list, edit the method name text, and save our new method. To delete a method, we hover over it in the list and select the delete icon .
To test the endpoint, we leave the GET method selected and select Send.
https://postman-echo.com/get
The exact location (called "route") can provide more than one endpoint by accepting different methods. E.g., an API might have
a POST /customer endpoint for adding a new customer
a GET /customer endpoint for retrieving an existing customer.
We can select Send to fetch a response if our request doesn't require parameters or authentication.
Otherwise, specify our parameters and any body data we need to send to the API.
We can set up any required authentication and headers if we don't need to send data with our request.
🔥Sending parameters
We can send path and query parameters with our requests using the Params tab and the URL field.
Query parameters are added to the end of the request URL, following ? and listed in key-value pairs. They are separated by '&' using the following syntax:
?id=1&type=new
Path parameters form part of the request URL and are referenced using placeholders as in the following example: /customer/:id.
To send a query parameter:
we add it directly to the URL or
open Params and enter the name and value.
When we enter our query parameters in either the URL or the Params fields, these values will update everywhere they're used in Postman.
Parameters aren't automatically URL-encoded. Right-click the selected text and choose EncodeURIComponent to encode a parameter value manually.
To send a path parameter, enter the parameter name into the URL field, after a colon, e.g., id. When we enter a path parameter, Postman will populate it in the Params tab, where we can edit it.
We can add descriptions to our parameters, and they'll appear for anyone sharing the request (e.g., in our workspace) or viewing our API documentation.
We can use the Bulk Edit option if we prefer to enter our parameters in plain text instead of using the request builder.
Select Send if our request doesn't require body data, auth, or headers. Otherwise, set up our body, auth, and headers.
🔥Sending body data
We will need to send body data with requests whenever we need to add or update structured data. E.g., if we send a request to add a new customer to a database, we might include the customer details in JSON. Typically we will use body data with PUT, POST, and PATCH requests.
The Body tab in Postman allows us to specify the data we need to send with a request. We can send various types of body data to suit our API.
If we send body data, ensure we have the correct headers selected to indicate the content type our API may need to process the received data correctly.
For form-data and url-encoded body types, Postman will automatically attach the correct Content-Type header.
If we use raw mode for our body data, Postman will set a header based on the type we select (such as text or JSON).
If we manually select a Content-Type header, that value will precede what Postman sets.
Postman doesn't set any header type for the binary body type.
By default, Postman will select None—leave it chosen if we don't need to send a body with our request.
Website forms often send data to APIs as multipart/form-data. We can replicate this in Postman using the form-data Body tab. Form data allows us to send key-value pairs and specify the content type.
We can attach files using form data. When we repeatedly make API calls that send duplicate files, Postman will persist our file paths for subsequent use. This also helps us run collections that contain requests requiring file upload. Uploading multiple files, each with its content type, isn't supported.
🔥URL-encoded
URL-encoded data uses the same encoding as URL parameters. Suppose our API requires url-encoded data, select x-www-form-url-encoded in the Body tab of our request. Enter our key-value pairs to send with the request, and Postman will encode them before sending.
There is sometimes confusion between form data and url-encoded. If we are unsure which one we need, check with our API provider.
🔥Raw data
We can use raw body data to send anything we can enter as text. Use the raw tab and the type dropdown list to indicate the format of our data (Text, JavaScript, JSON, HTML, or XML). Postman will enable syntax highlighting as well as appending the relevant headers to our request.
We can manually set a content type header if we need to override the one Postman sends automatically.
We can use variables in our body data, and Postman will populate their current values when sending our request.
To beautify our XML or JSON, select the text in the editor and then select ⌘+Option+B or Ctrl+Alt+B.
🔥Binary data
We can use binary data to send information we can't enter manually in the Postman editor. We can send information with our request body, such as images, audio, and video files (we can also send text files).
🔥GraphQL
We can send GraphQL queries with our Postman requests by selecting the GraphQL tab in the request Body. We enter our code in the Query area and any variables in the GraphQL Variables section.
🔥Authenticating requests
Some APIs require auth details we can send in Postman. Authentication involves confirming the identity of the client sending a request. The authorisation ensures that the client has permission to carry out the endpoint operation. We open the Authorisation tab to configure our access details.
Postman will automatically include our auth details in the relevant part of the request, e..g., in Headers.
Once our auth and other request details are set up, select Send to run our request. Now we will configure the request headers. We will learn further about how to build the requests in Postman.
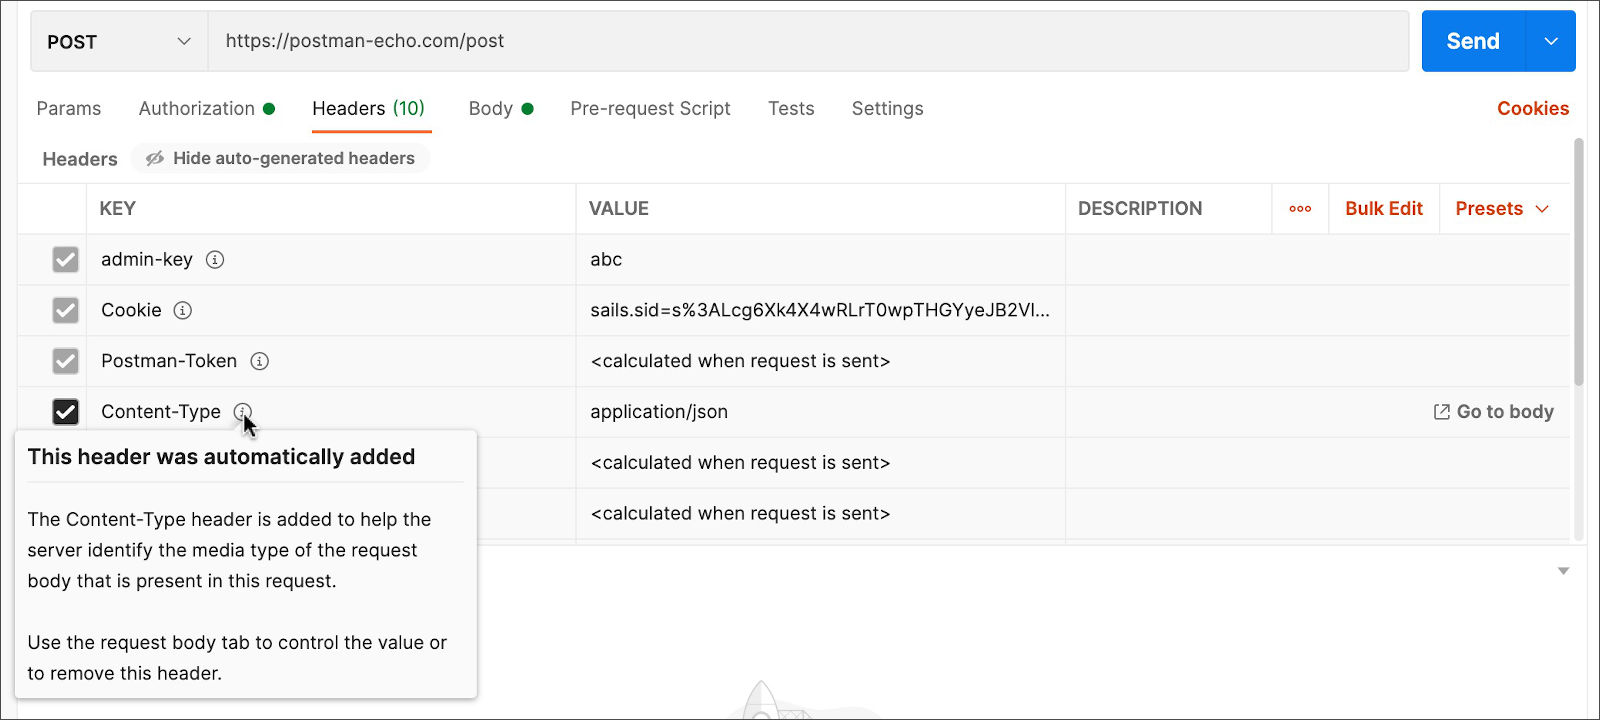
🔥Configuring request headers
Some APIs require us to send particular headers and requests, typically to provide additional metadata about the operation we are performing. We can set these up in the Headers tab. Enter any key-value pairs we need, and Postman will send them along with our request. As we enter text, Postman prompts us with standard options we can use to autocomplete our setup, such as Content-Type.
We can save commonly used headers together in a header preset. In the Headers tab, select Presets, and choose Manage Presets. We add each preset by providing a name and entering the key plus value. Select Add, and our preset will be available in the Presets dropdown list. Selecting the preset will auto-populate the fields in our request headers.
🔥Autogenerated headers
Postman will automatically add specific headers to our requests based on our request selections and settings. Select hidden at the top of the headers tab for information about what Postman will send with our request.
Hover over a header for details about it. Postman will indicate why the header has been added. The fact will demonstrate how to deactivate or override a header value if necessary.
Deactivating or overriding recommended headers may make our request behave unexpectedly.
If we need to change a header, we can do so in the relevant part of Postman, e.g.:
the Authorisation tab
the request Body
Cookies for the requested domain
in the Settings
and sometimes directly in the Headers tab itself.
If we need to go to a different part of the app, Postman will show a link on the right-hand side.
If a header has been added based on our auth setup, select the Authorisation tab to change it.
To alter cookie headers, amend the cookie setup for the domain to which we're sending the request.
To deactivate an autogenerated header directly in Headers, uncheck its checkbox.
To override an autogenerated header value
uncheck the autogenerated entry
add a separate entry for the header, listing its name in the Key field and specify our value in the Value field.
Suppose we have more than one entry for the same header. In that case, Postman will indicate which one will be overridden
prioritising headers we have either explicitly added directly in Headers or
indirectly with selections, we made in the other parts of our request, such as authorisation.
Postman will automatically calculate values based on the Body tab data when we send our request for Content-Length and Content-Type headers. However, we can override both values.
Once our headers and other request details are set up, we can select Send to run our request.
🔥Using cookies
we can manage Cookies for our domains from Postman. Select Cookies (under Send). For more information, see Managing cookies.
🔥Choosing custom settings
We can configure various settings for Postman requests using the request Settings tab. These allow us to apply non-standard logic to our requests.
🔥Encoding our request URLs
Postman parses and encodes our request URL to maximise the chances of a successful API call. Postman encodes the characters in our URL and maps them to a representation our API will most likely accept. The Postman URL processor optimises the chance of our request being effectively processed by the wide range of server implementations. The processor will encode characters depending on where they occur in the URL:
The processor is turned on by default in Postman, but we can turn off encoding if we work with an unusual server implementation. To turn this setting on or off in our request, select Settings > Encode URL automatically.
We can selectively encode parts of our URL by highlighting the text and right-clicking, then choosing EncodeURIComponent.
🔥Troubleshooting our requests
Postman will indicate any whitespace or invalid characters in parts of our request that may not function as expected so that we can rectify our values. Invalid characters are highlighted in the
request method
URL (including the path)
parameters
headers (including our key names)
body.
If Postman cannot send our request or doesn't receive a response, we will get a message with details about the error. Select View in Console to get an overview of our request and help identify the issue's source.
Frequently Asked Questions✍️
What are the postman services?
Postman is an API platform that allows you to create and use APIs. Postman improves collaboration and simplifies each phase of the API lifecycle, allowing you to design better APIs more quicker.
How do API calls take place?
Simply, an API call occurs when you append an endpoint to a URL and submit a request to a server. For instance, you are essentially performing an API call when you use a browser to ask a query or log into any app.
What do you understand by the term environment in postman?
An environment in postman is a set of key-value pairs. You can create multiple environments in postman that can be switched quickly with a button. There are two types of environment, Global and Local.
Conclusion
This post gave us a brief overview of Implementing Hello World using The Play framework. We learnt various techniques and best practices to build the requests in Postman. I hope we enjoyed reading our blog on ‘How to build the requests in Postman'.
Here are some articles which will aid our learning about ‘How to build the requests in Postman’.


 9+ registered

