


Introduction
Hey Ninjas! Have you ever heard about Amazon Cloud Service, aka AWS? AWS is a tool made up of many different cloud computing products and services. AWS helps companies with various workloads, such as game development, warehousing, and development.

Today, we will learn one of the AWS topics: Important Steps for AWS Opsworks in Puppet Enterprise. If you are new to this, it is suggested to first go through the basics of AWS Opsworks for Puppet Enterprise.
Creating a PEM
PEM is Puppet Enterprise Master. The Puppet Master is a centralized configuration server with the definitions and instructions to install apps and server roles. There are ways to create Puppet Master.
⭐Using the AWS Management Console.
⭐Using the AWS CLI.
Let's discuss both one by one.
Using the AWS Management Console
Follow the steps given below to create a Puppet Enterprise Master using the AWS Management Console.
✍🏻 Now, sign in to the AWS Management Console and open the AWS OpsWorks console here.
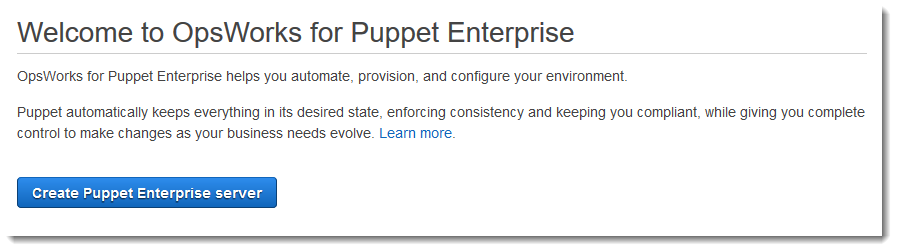
✍🏻 Click on Go to OpsWorks for Puppet Enterprise on the home page.
✍🏻 Select Create Puppet Enterprise server.
✍🏻 Fill in the server name, server region, and EC2 instance type in Set name, region, and type.
✍🏻 You can either mention a key pair name in the Configure Server Page or leave the selection as default in the SSH key drop-down list. In case you have the private key, you can paste it into the R10K private key. It is not required if you are using HTTP Authentication. Click Next.

✍🏻 Leave the Specify server endpoint as the default unless you want a custom domain server for yourself. Go to the next step to configure a custom domain.
✍🏻 Provide a VPC, subnet, and one or more security groups in the Network and security area.
✍🏻 Set the day and time in the System Maintenance to the time when the server has low demands in working hours.
✍🏻 By default, Automated backup is turned on. You can disable it by clicking on No.
✍🏻 Click on Next when you are done with configuring the advanced setting.
✍🏻 Click on Launch after reviewing your choice in the Review Section.
Using the AWS CLI
The AWS CLI is AWS Command Line Interface, a tool that manages AWS services. AWS OpsWorks can create a simple security group for the user if they do not specify one in the AWS CLI. Note that it does not create a service role by default. You must give a service role ARN as part of your create-server command.
Install the AWS CLI if you do not have it in your system.
✒️ First thing you need while creating AWS CLI is a subnet ID, so you must have a VPC.
✒️ Now, you have to create a service role and an instance profile. For creating both of these, AWS Opsworks provides an AWS CloudFormation template. Run the command below to create the AWS CloudFormation stack.
aws cloudformation create-stack --stack-name OpsWorksCMRoles --template-url https://s3.amazonaws.com/opsworks-cm-us-east-1-prod-default-assets/misc/opsworks-cm-roles.yaml --capabilities CAPABILITY_NAMED_IAM
✒️ Now, Find and copy the ARNs of service roles in your account after you are done with AWS CloudFormation.
aws iam list-roles --path-prefix "/service-role/" --no-paginate
Make a note of the given service role ARNs entries. This will help you while creating the Puppet Enterprise Master.
{
    "AssumeRolePolicyDocument": {
        "Version": "2012-10-17",
        "Statement": [
            {
                "Action": "sts:AssumeRole",
                "Effect": "Allow",
                "Principal": {
                    "Service": "ec2.amazonaws.com"
                }
            }
        ]
    },
    "RoleId": "AROZZZZZZZZZZQG6R22HC",
    "CreateDate": "2022-10-16T20:42:20Z",
    "RoleName": "aws-opsworks-cm-ec2-role",
    "Path": "/service-role/",
    "Arn": "arn:aws:iam::000000000000:role/service-role/aws-opsworks-cm-ec2-role"
},
{
    "AssumeRolePolicyDocument": {
        "Version": "2012-10-17",
        "Statement": [
            {
                "Action": "sts:AssumeRole",
                "Effect": "Allow",
                "Principal": {
                    "Service": "opsworks-cm.amazonaws.com"
                }
            }
        ]
    },
    "RoleId": "AROZZZZZZZZZZZZZZZ6QE",
    "CreateDate": "2022-10-16T20:42:20Z",
    "RoleName": "aws-opsworks-cm-service-role",
    "Path": "/service-role/",
    "Arn": "arn:aws:iam::000000000000:role/service-role/aws-opsworks-cm-service-role"
}
✒️ Now, Find the instance profile ARNs in your account and copy them.
aws iam list-instance-profiles --no-paginate
Make a note of the given instance profile ARNs entries. This will help you while creating the Puppet Enterprise Master.
{
    "Path": "/",
    "InstanceProfileName": "aws-opsworks-cm-ec2-role",
    "InstanceProfileId": "EXAMPLEDC6UR3LTUW7VHK",
    "Arn": "arn:aws:iam::123456789012:instance-profile/aws-opsworks-cm-ec2-role",
    "CreateDate": "2022-10-16T20:42:20Z",
    "Roles": [
        {
            "Path": "/service-role/",
            "RoleName": "aws-opsworks-cm-ec2-role",
            "RoleId": "EXAMPLEE4STNUQG6R22HC",
            "Arn": "arn:aws:iam::123456789012:role/service-role/aws-opsworks-cm-ec2-role",
            "CreateDate": "2022-10-16T20:42:20Z",
            "AssumeRolePolicyDocument": {
                "Version": "2012-10-17",
                "Statement": [
                    {
                        "Effect": "Allow",
                        "Principal": {
                            "Service": "ec2.amazonaws.com"
                        },
                        "Action": "sts:AssumeRole"
                    }
                ]
            }
        }
    ]
},
✒️ Run create-server to create the OpsWorks for Puppet Enterprise Master.
aws opsworks-cm create-server --engine "Puppet" --engine-model "Monolithic" --engine-version "2019" --server-name "server_name" --instance-profile-arn "instance_profile_ARN" --instance-type "instance_type" --engine-attributes '{"PUPPET_ADMIN_PASSWORD":"ASCII_password"}' --key-pair "key_pair_name" --preferred-maintenance-window "ddd:hh:mm" --preferred-backup-window "ddd:hh:mm" --security-group-ids security_group_id1 security_group_id2 --service-role-arn "service_role_ARN" --subnet-ids subnet_ID
Let's understand the creation of PEM using an example.
aws opsworks-cm create-server \
    --engine "Puppet" \
    --engine-model "Monolithic" \
    --engine-version "2019" \
    --server-name "puppet-02" \
    --instance-profile-arn "arn:aws:iam::111122223333:instance-profile/aws-opsworks-cm-ec2-role" \
    --instance-type "m5.xlarge" \
    --engine-attributes '{"PUPPET_ADMIN_PASSWORD":"zZZzDj2DLYXSZFRv1d"}' \
    --key-pair "amazon-test"
    --preferred-maintenance-window "Mon:08:00" \
    --preferred-backup-window "Sun:02:00" \
    --security-group-ids sg-b00000001 sg-b0000008 \
    --service-role-arn "arn:aws:iam::111122223333:role/service-role/aws-opsworks-cm-service-role" \
    --subnet-ids subnet-383daa71 \
    --tags [{\"Key\":\"Stage\",\"Value\":\"Production\"},{\"Key\":\"Department\",\"Value\":\"Marketing\"}]
✒️ This may take time. Do not close the tab, as it may contain important data that is not shown again.
Use the Endpoint attribute if you are using a custom domain. Here is an example.
"Endpoint": "puppet-07-exampleexample.opsworks-cm.us-east-1.amazonaws.com"
✒️ If you are not using the custom domain, you can directly go to the next step.
Now our section is to Configure the Puppet Master Using the Starter Kit.


 6+ registered

