Do you think IIT Guwahati certified course can help you in your career?
Introduction
After you've set up a Vaadin-Environment, you can start working on a Vaadin Framework project in the IDE of your choice.
Maven, a popular build and dependency management system, makes the Vaadin Framework core library and all Vaadin add-ons available. A Maven archetype is recommended for creating a Vaadin application project. The archetypes contain all of the required dependencies, which Maven handles.
Creating First Application in Vaadin
Let's start by creating first application in Vaadin using the tools we installed in the previous section. To begin, launch Eclipse and proceed as follows:
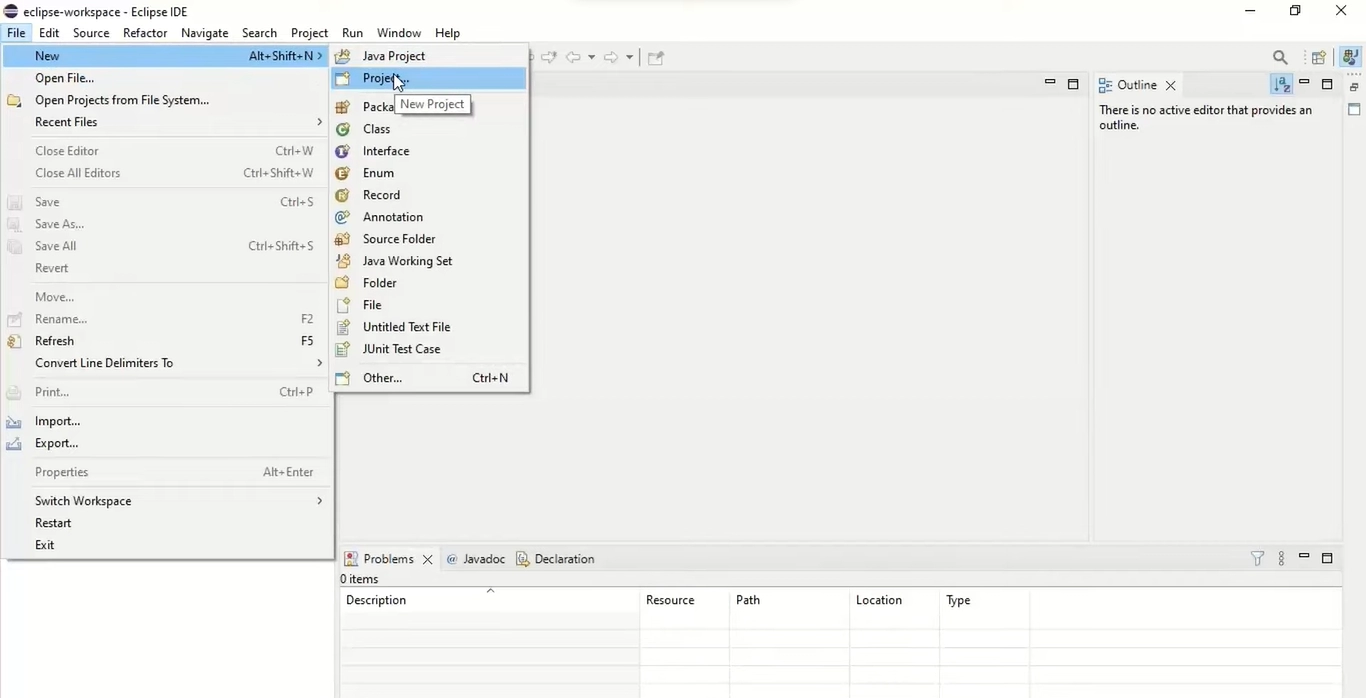
1.To Begin a new project, select File -> New Project from the menu.
2. Select Vaadin Vaadin 8 Project (Maven) in the New Project window that appears and click Next.
3. You must select the project type in the Select a Maven archetype step. Select the Single-module Application Project to create a simple test project.
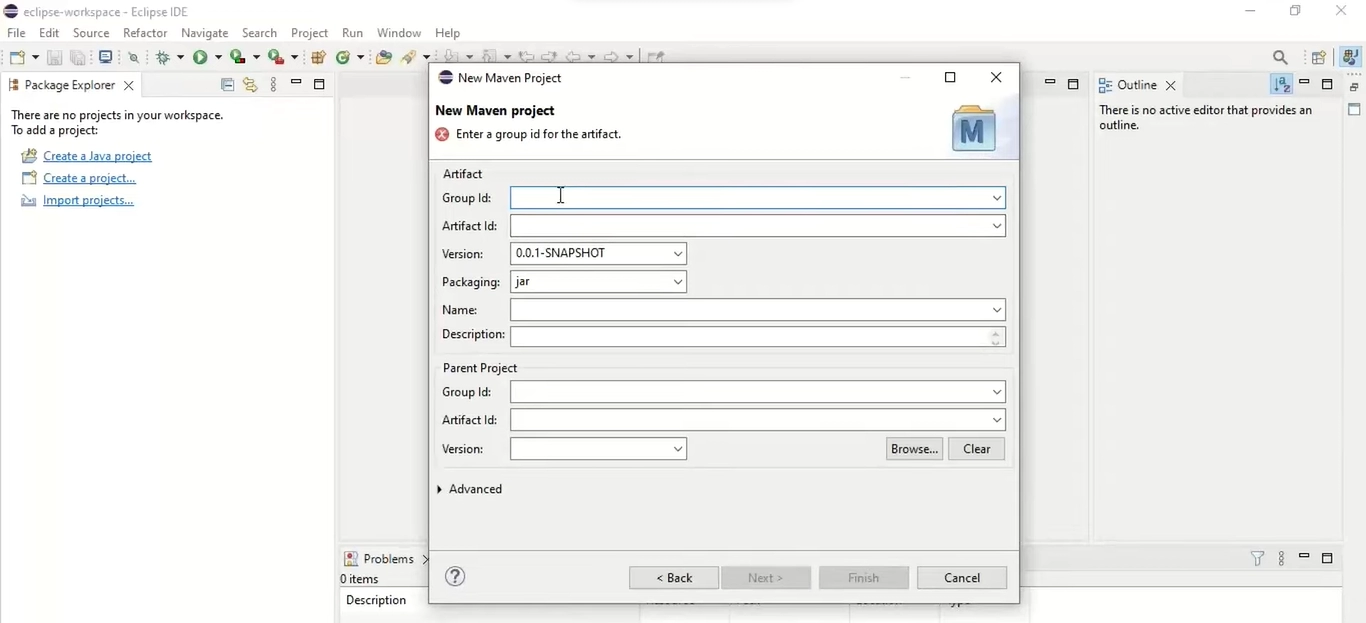
4. You must provide the Group Id and the Artifact Id in the Specify archetype parameters step. For the other settings, the default values should suffice.
🔥 Group Id Assign an organization-level identifier to the project, such as com.example. Because it is used as a prefix for your Java package names, it must be a valid Java package name in and of itself.
🔥 Artifact Id Give the project a name, such as myproject. The artefact ID must be the name of a valid Java sub-package.
🔥 Version Give the project a Maven-compliant version number, such as 1.0-SNAPSHOT. The version number should usually begin with two or more integers separated by dots and should not include any spaces.
🔥 Package Give the project's base package name, such as com.example.myproject. It is generated by default from the group ID and the artefact ID.
🔥 Properties Enter values for archetype-specific properties that control the naming of various project elements, such as the class name.
You can change the version in the pom.xml file later.
Finally, click Finish to complete the project creation.
Exploring the Project
After creating first application in Vaadin, let us explore our project.
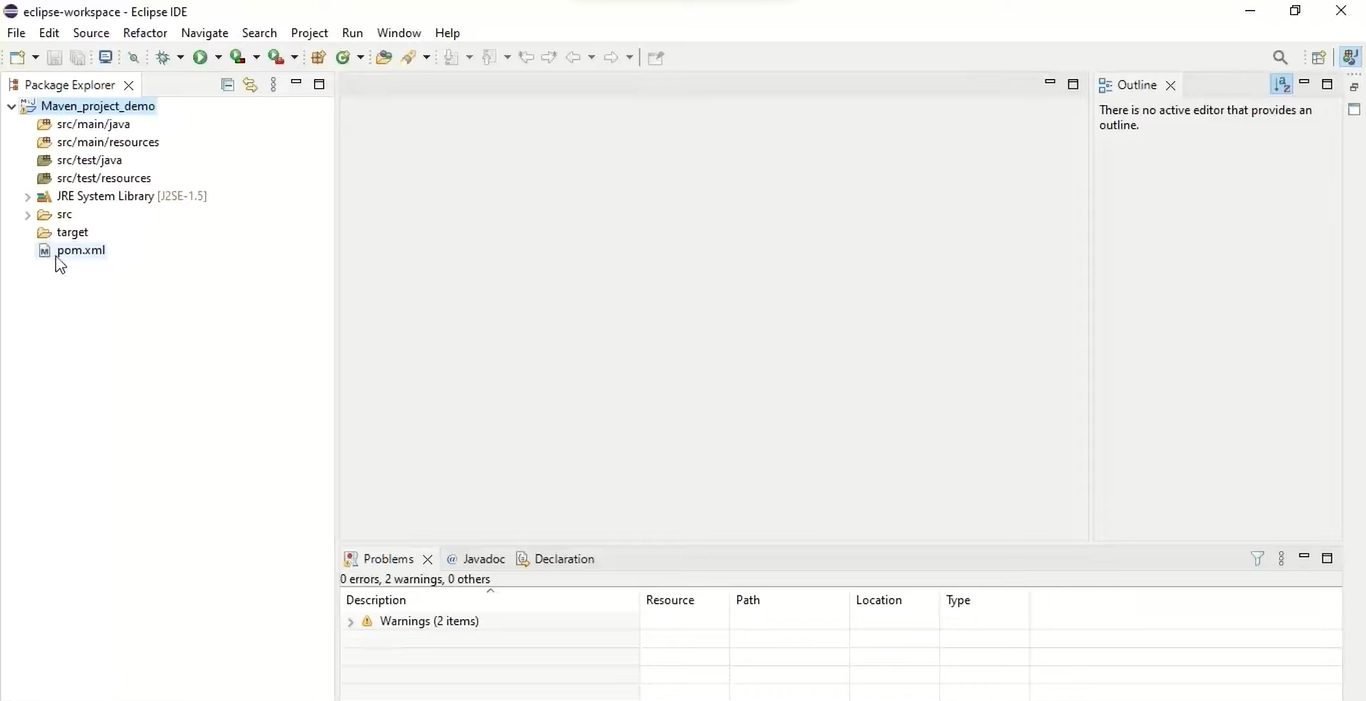
The New Project wizard has completed all of the work for you. The src directory now contains a UI class skeleton. A new Vaadin project displays the project hierarchy as seen in Project Explorer.
Maven manages the Vaadin libraries and other dependencies. Even though the libraries are listed in the Java Resources Libraries Maven Dependencies virtual folder, they are not stored in the project folder.
The User Interface Class
The following code is included in the plug-UI in class:
package com.example.myproject;

import com.vaadin.ui.UI;
...

@Theme("mytheme")
public class MyUI extends UI {

     @Override
    protected void init(VaadinRequest vaadinRequest) {
        final VerticalLayout layout = new VerticalLayout();

        final TextField name = new TextField();
        name.setCaption("Type your name here:");

        Button button = new Button("Click Me");
        button.addClickListener(e ->
            layout.addComponent(new Label("Thanks " + name.getValue()
                    + ", it works!")));

        layout.addComponents(name, button);

        setContent(layout);
    }


    @WebServlet(urlPatterns = "/*", name = "MyUIServlet", asyncSupported = true)
    @VaadinServletConfiguration(ui = MyUI.class, productionMode = false)
    public static class MyUIServlet extends VaadinServlet {
    }
}
Compiling the theme
Click the Compile Vaadin Theme button in the toolbar before running the project for the first time.
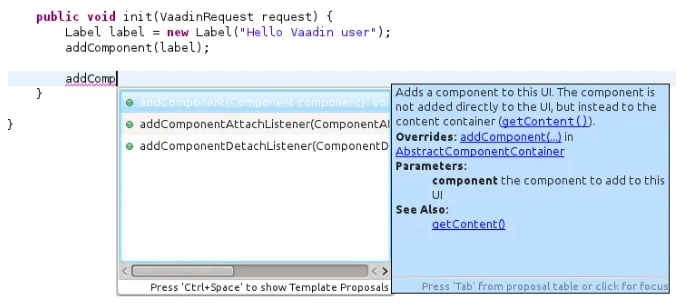
Completion of the Code
Code completion is one of Eclipse's most valuable features. Depending on the context of the cursor position, pressing Ctrl+Space in the editor will display a pop-up list of possible class name and method name completions, as shown in Java Code Completion in Eclipse.
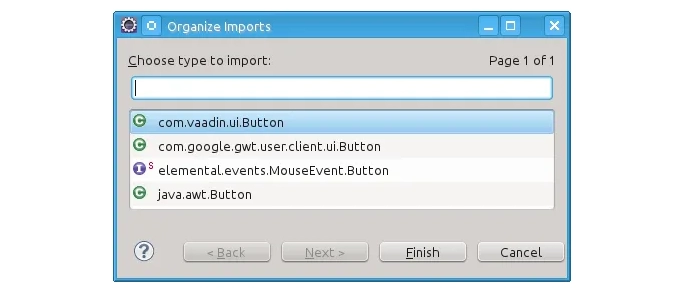
Generating Imports
Press Ctrl+Shift+O or click the red error indicator on the left side of the editor window to add an import statement for a class, such as Button. A list of alternatives is displayed if the class is available in multiple packages, as shown in Importing classes.
It would be best if you generally used the classes in the com.vaadin.ui or com.vaadin.server packages for server-side Vaadin development. Client-side classes (under com.vaadin.client) and GWT classes cannot be used for server-side development.
Configuring and Starting the Web Server
The Web Standard Tools package is installed in the Eclipse IDE for Java EE Developers, which allows control of various web servers and automatic deployment of web content to the server when project changes are made.
Check to see if Tomcat was installed with user permissions. If the user does not have write permissions to the configuration and deployment directories under the Tomcat installation directory, the web server configuration in Eclipse will fail.
Take the following steps:
In Eclipse, navigate to the Servers tab in the lower panel. After installing Eclipse, the list of servers should be empty. Select New Server from the context menu when you right-click on an empty area in the panel.
Select Apache Tomcat v8.0 Server and make localhost the server's hostname, which should be the default. If you only have one Tomcat installed, the Server runtime has only one option. Next, click.
Select your project on the left and then click Add to add it to the configured projects on the right. Finally, click Finish.
The server and project are now installed and visible in Eclipse's Servers tab. To launch the server, right-click it and select Debug. Select Start to start the server in non-debug mode.
The server starts and the project's WebContent directory is published to the server at http://localhost:8080/myproject/.
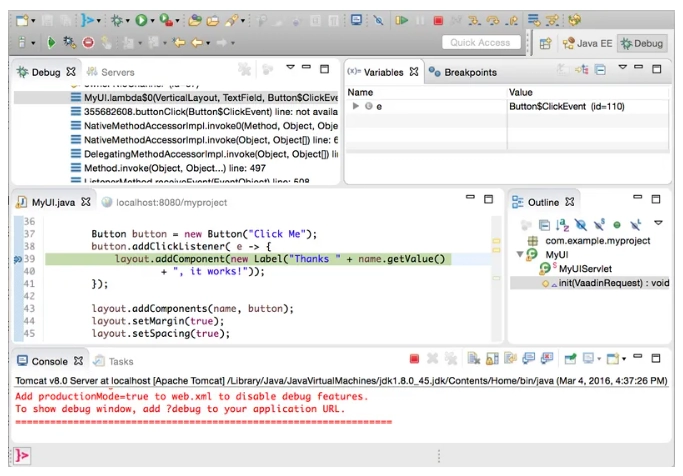
Debugging and Running
It's as simple as selecting myproject from Project Explorer and then clicking Run Debug As Debug on Server. The application is then launched in Eclipse's built-in web browser.
Frequently Asked Questions
Can Vaadin be used to create PWAs?
Yes. By default, Vaadin applications are progressive web apps. The starters create a manifest file and a service worker for an offline fallback page. Colors, icons, and the offline page can all be customized.
You can also use client-side views to make parts of your app, or even your entire app, work offline.
Can I incorporate Vaadin into an existing project?
Yes. The standards-based Vaadin components can be used in almost any project by installing them with npm and using them like any other HTML element.
Individual components or views from a Vaadin application can also be exported as web components embedded in another app.
Finally, you can create a Vaadin app that incorporates your existing app or parts of it.
Can I incorporate third-party components into Vaadin apps?
Yes, Vaadin is designed to be highly extensible. You can import and embed JavaScript components via npm or a CDN using Flow or Hilla. Java allows you to set and read properties and listen to JavaScript events. You can create a Java API for a component to make it easier to reuse in your project.
Conclusion
In this blog, we have extensively discussed creating first application in Vaadin, configuring and starting the web server, then concluding with running and debugging.
We hope this blog helps you enhance your knowledge about creating first application in Vaadin. We recommend you to visit our articles on different topics of Vaadin, such as


 9+ registered

