Do you think IIT Guwahati certified course can help you in your career?
Introduction
REST’s name is referred to as "Representational State Transfer." It was invented by the same guy who designed HTTP, Roy Thomas Fielding. Enhancing the efficacy of web services is the primary goal of RESTful web services. RESTful web services define their services using several concepts that are already present in HTTP. The architectural approach known as REST is not a protocol.
It does not specify the usual message exchange format. REST services can be built using XML or JSON, respectively. JSON is the most popular format when it comes to REST. A resource is a critical abstraction in REST. Resources might be everything and anything. A Uniform Resource Identifier can lead to it (URI). An example would be:
Only a small number of the resource's formats, such as XML, HTML, and JSON, are currently covered by representational resources. We offer a fictitious version of the help when we ask for it.
HTTP's key techniques
Among HTTP's fundamental techniques are
GET: A resource is read.
PUT: It updates a resource that already exists.
POST: It creates a new resource when you POST.
DELETE: This operation ends the resource.
The following standard status code is defined by HTTP as well:
404: RESOURCE NOT FOUND
200: SUCCESS
201: CREATED
401: UNAUTHORIZED
500: Server Error
REST Service Constraints
Both service providers and consumers are necessary.
It is an international service.
It must be possible to cache the service results.
Resources are exposed using a consistent interface.
A layered architecture for the service should be assumed.
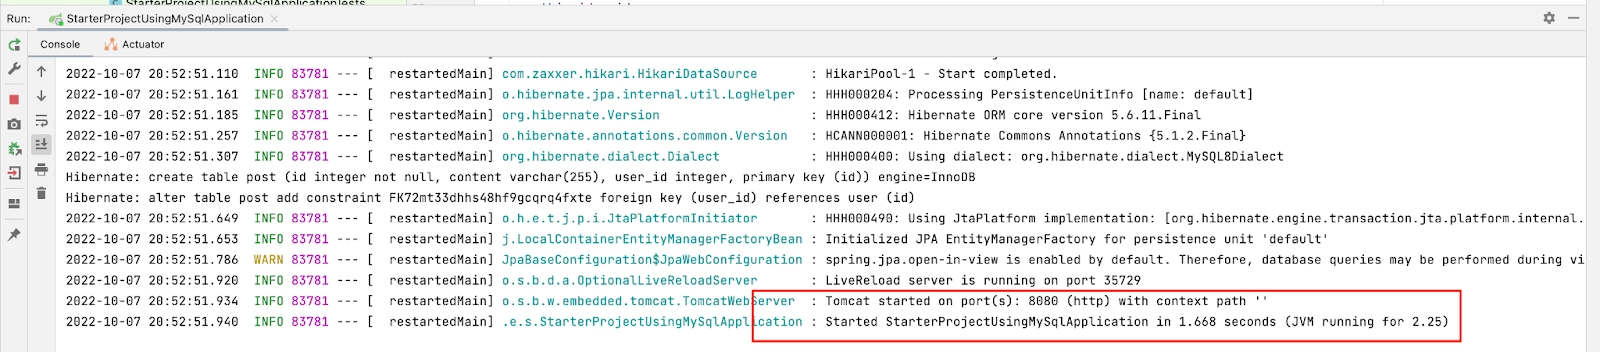
Implementation of Creating A Post For Specific Users
To create a post for a specific user, we shall allow post-operation in this area.
Step 1: Creating data Entities
Create User and Post class and @Entity annotation to represent these as a model/entity.
Add getters and setters to the User and Post class.
Add toString() method to the User and Post class. (Optional but better to have)
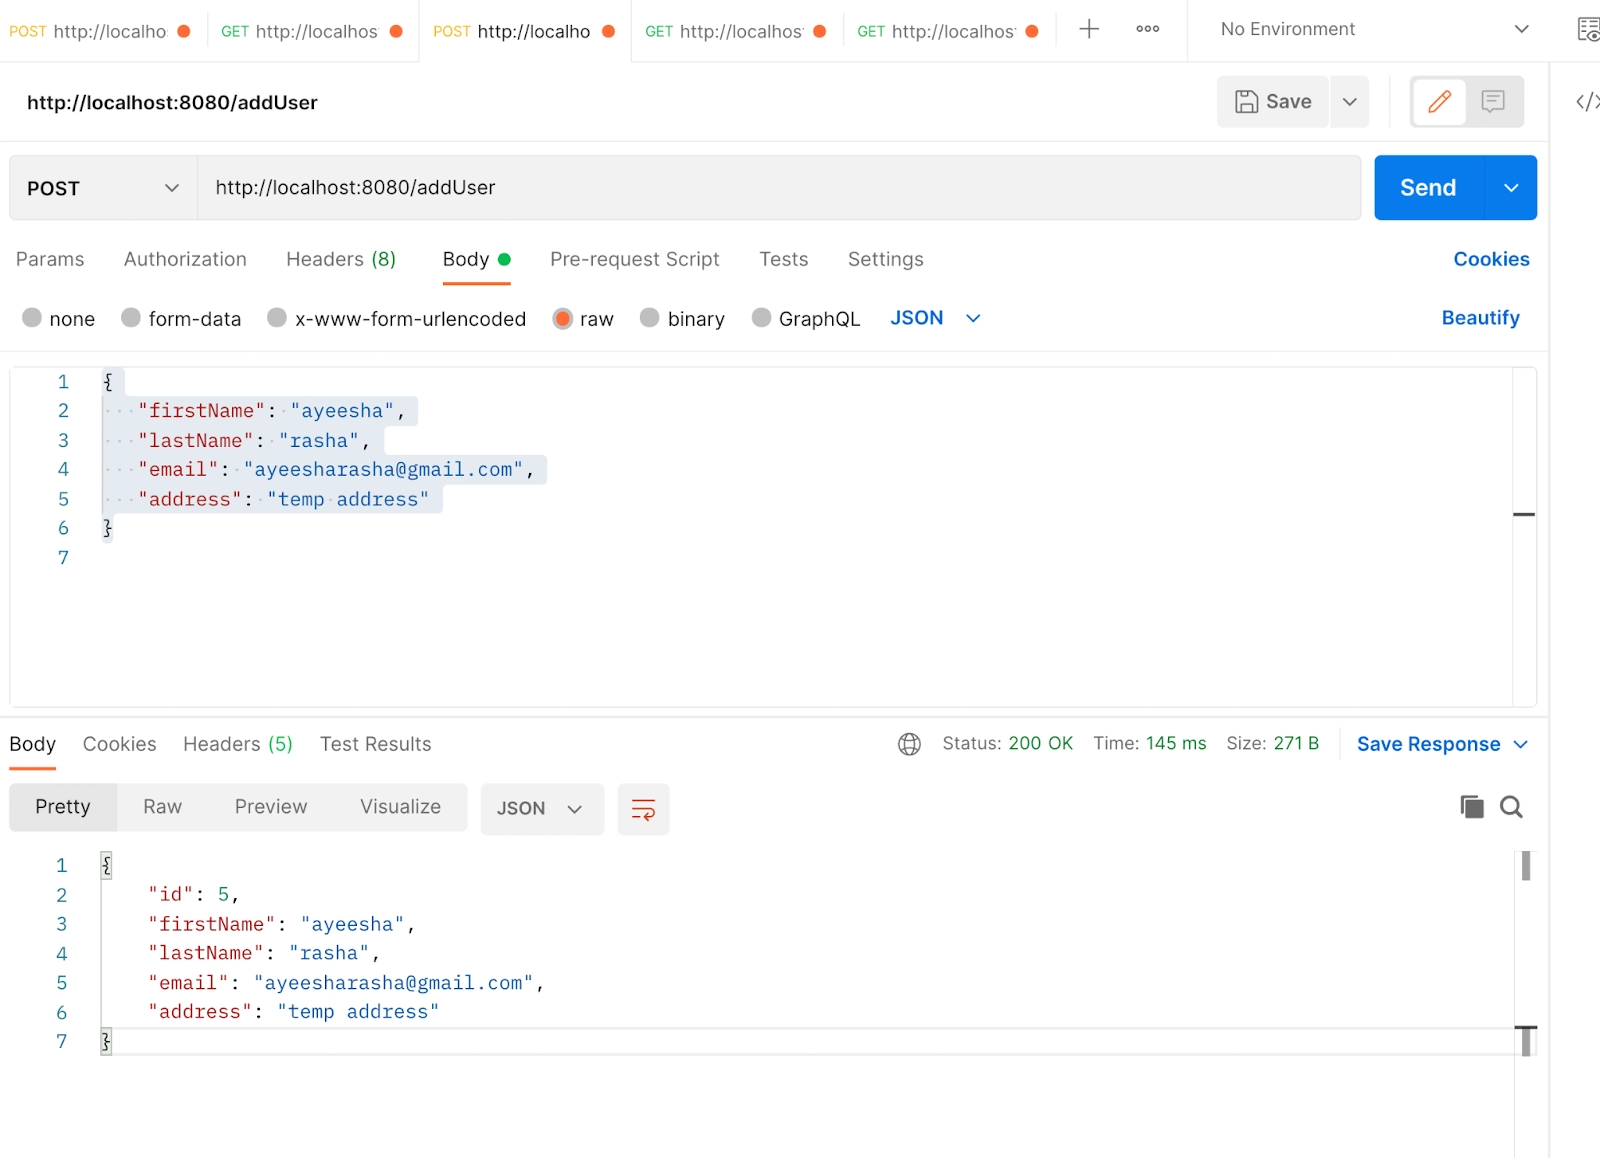
Open postman and add URL http://localhost:8080/addUser to add the user. Choose Post as HTTP method. Select body, then select raw and then select JSON from the dropdown. Add the following JSON and send the request.
{
  "firstName": "ayeesha",
  "lastName": "rasha",
  "email": "ayeesharasha@gmail.com",
  "address": "temp address"
}
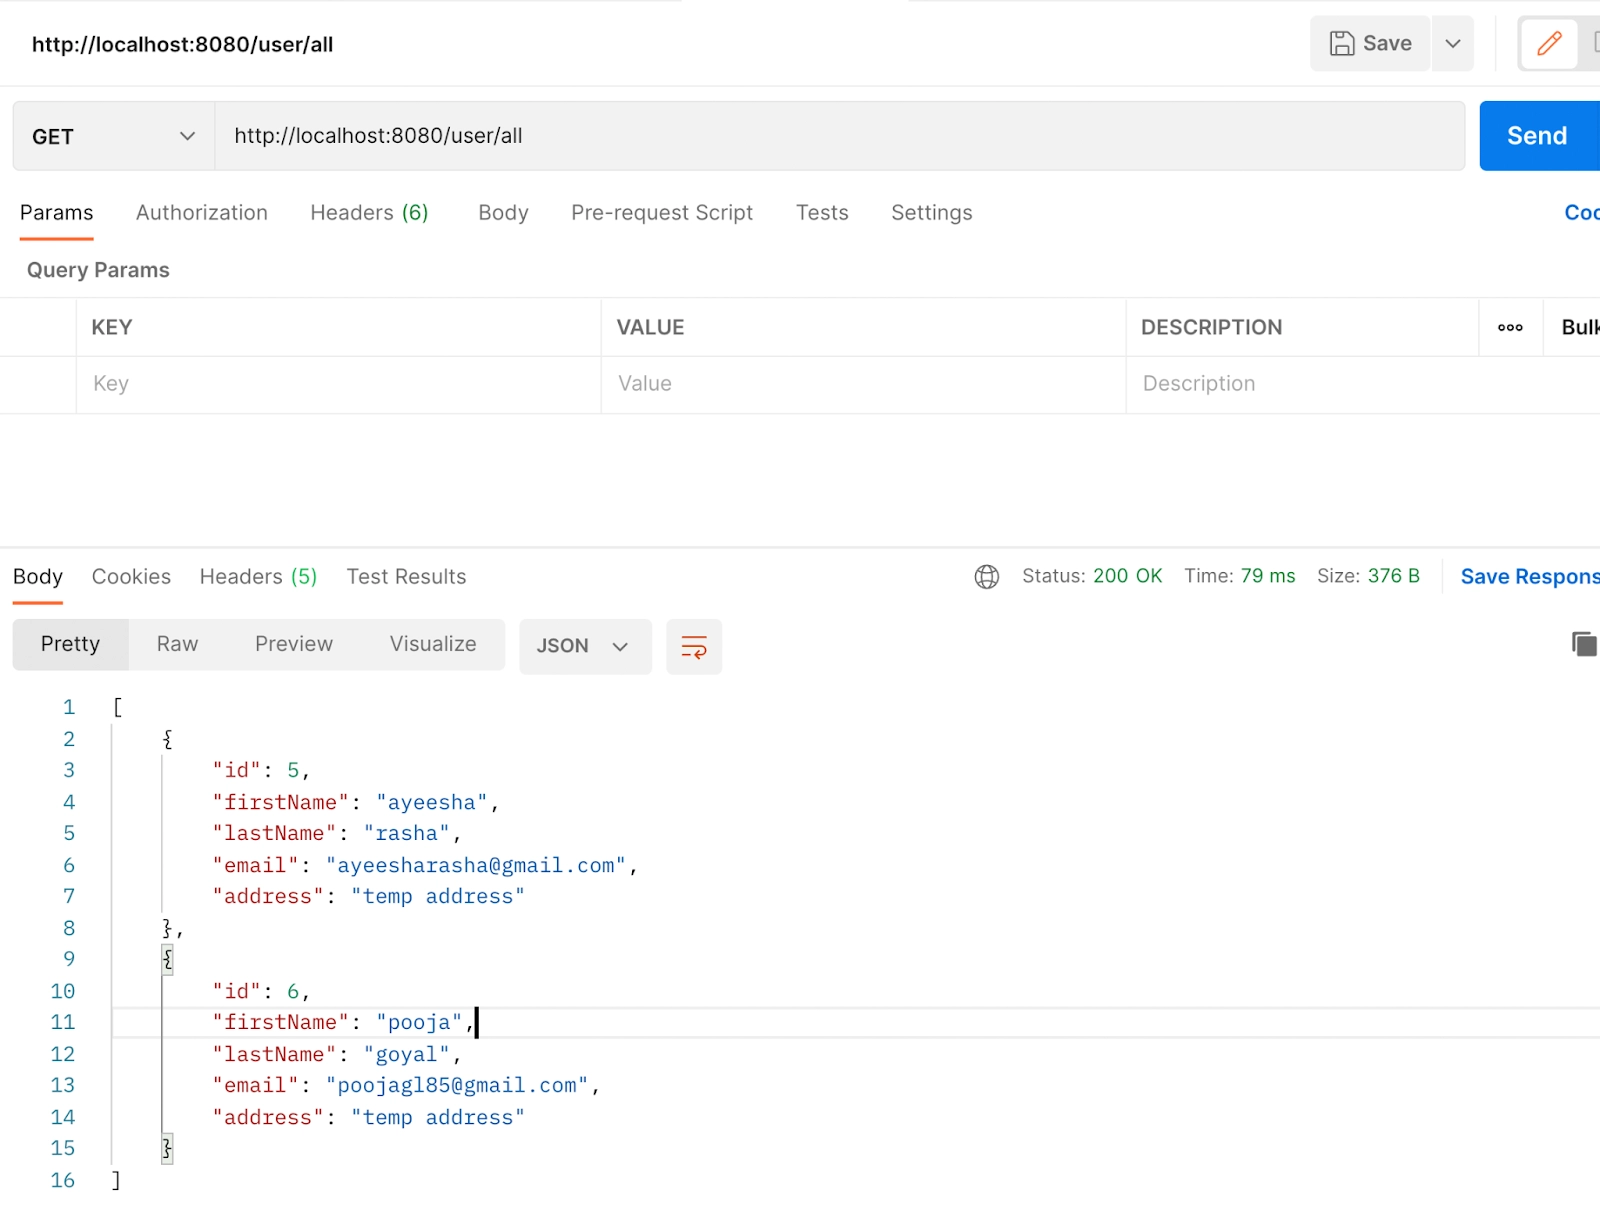
You can add more users in the similar way. To see if the user is saved or not in the new tab add the URL http://localhost:8080/user/all and HTTP method as GET and send the request.
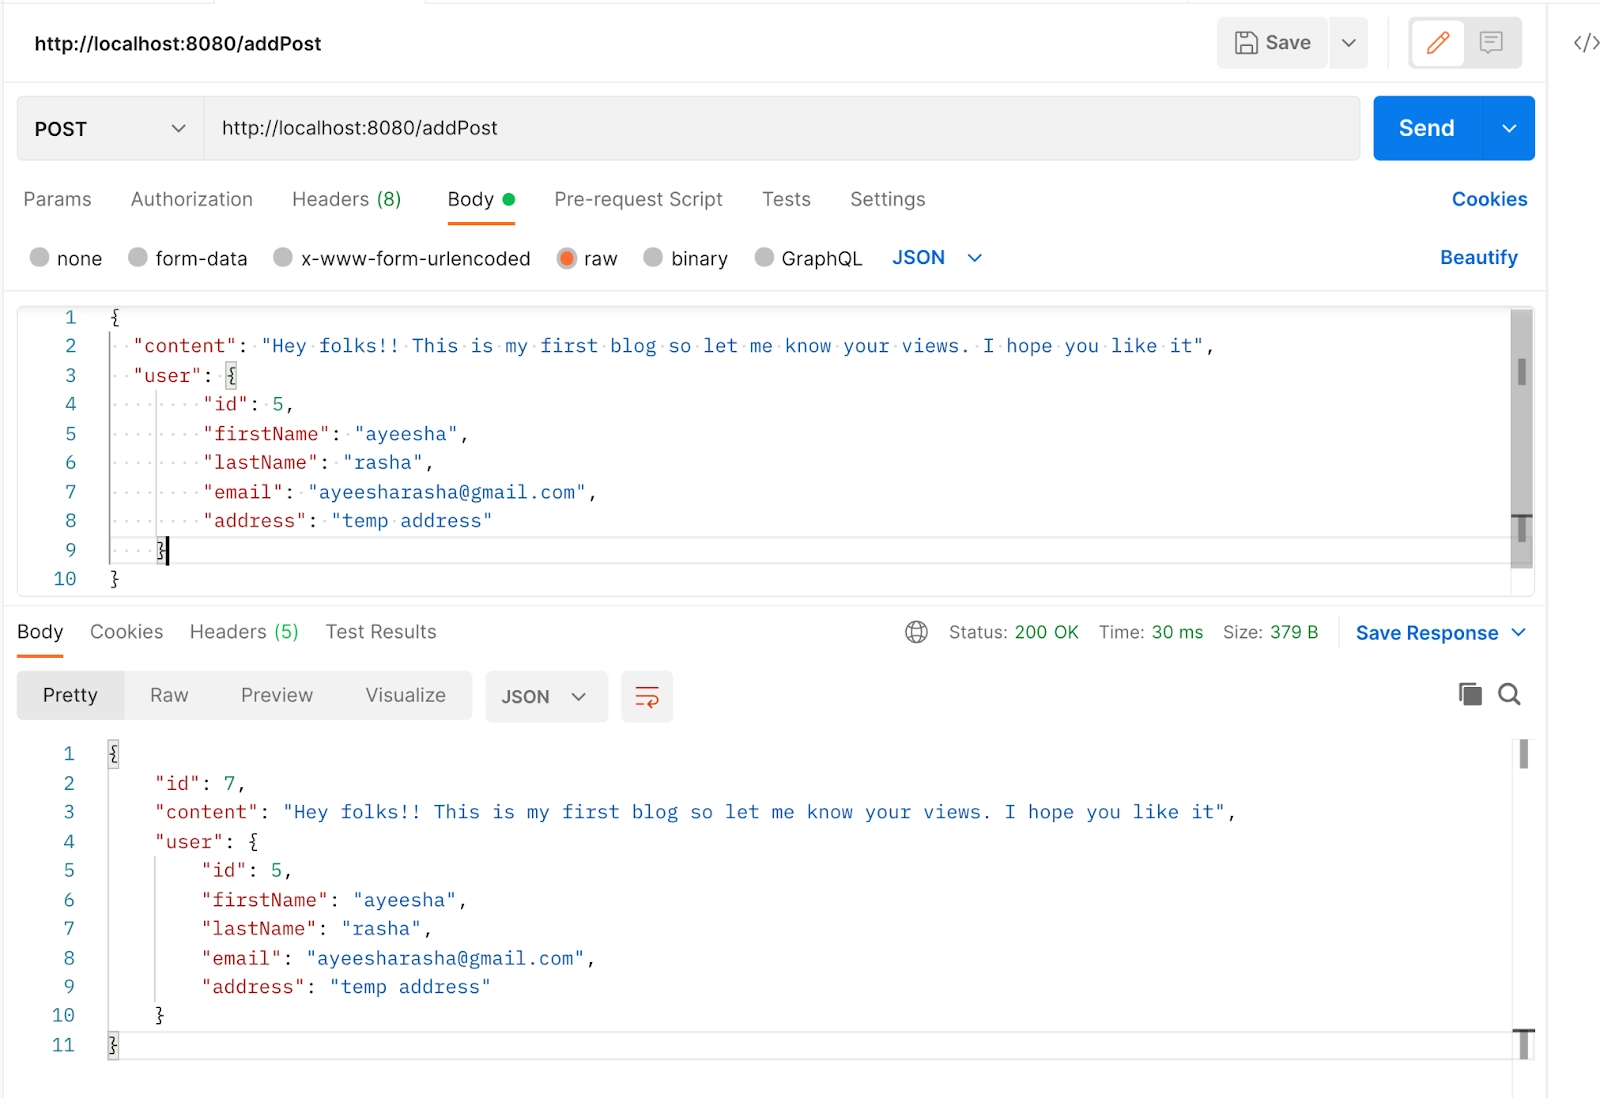
The similar as we added the user we will be adding the post of the user with following JSON data, URL = http://localhost:8080/addPost, HTTP method: POST
The post is added to the table post.
Add some more post for some other users as well. After adding my POST table looks something like this.
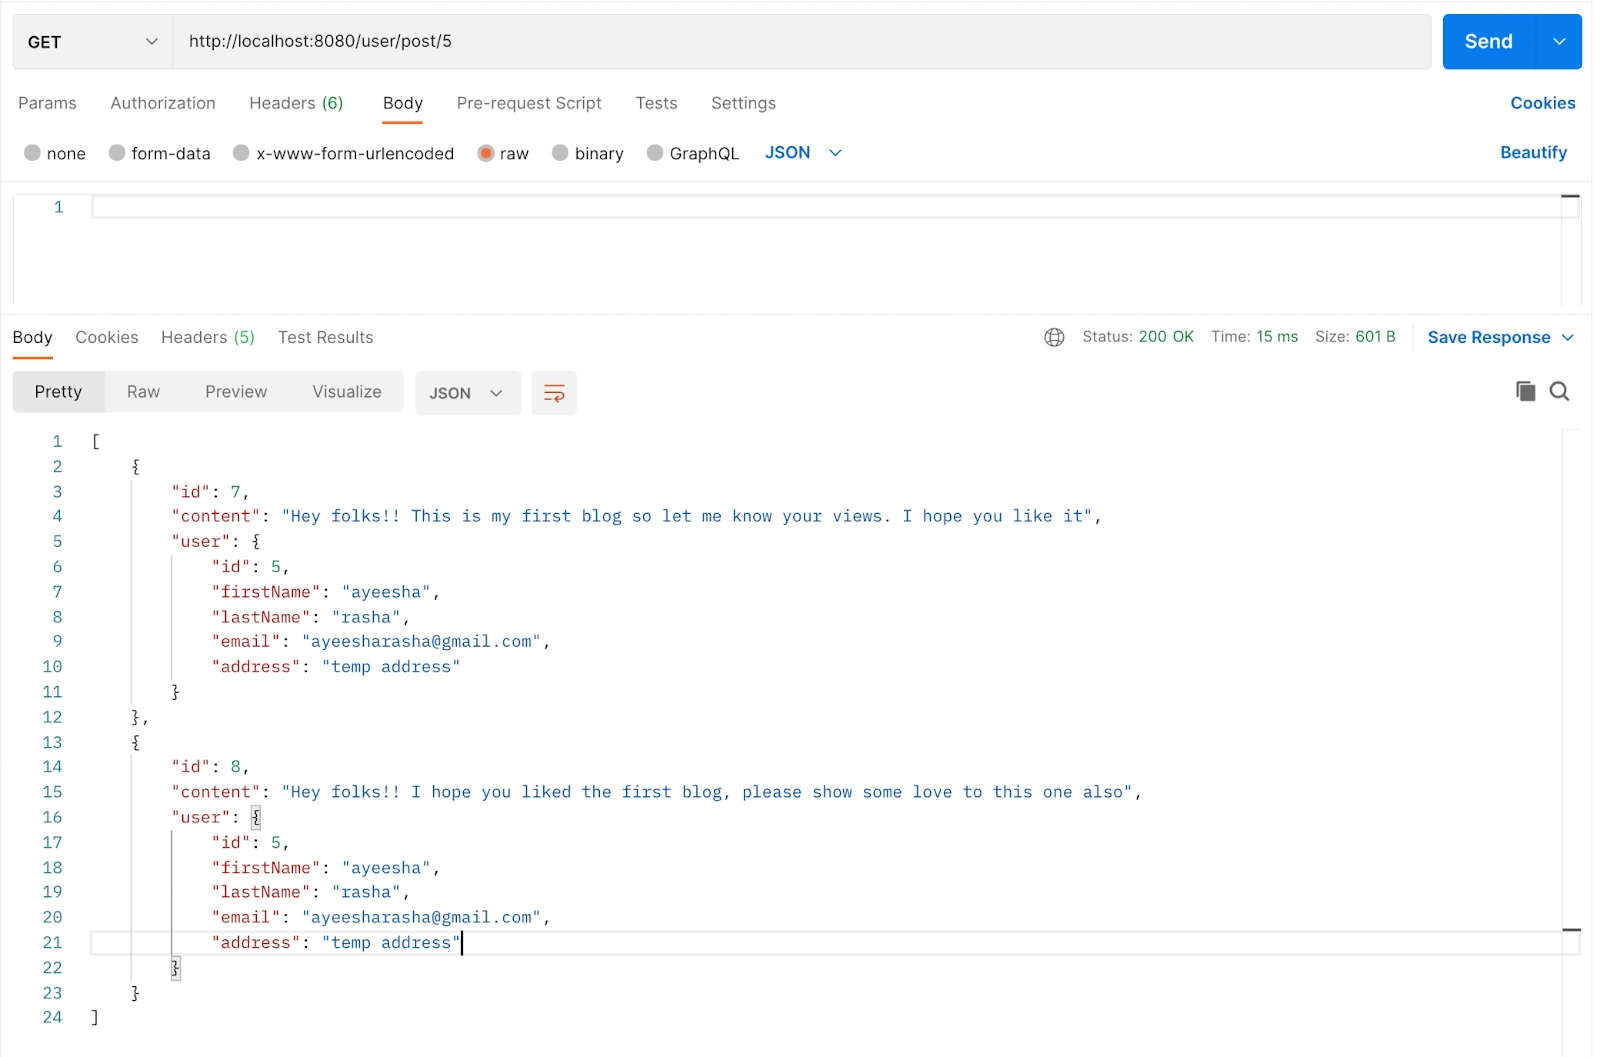
To see all the post of the particular user navigate to URL http://localhost:8080/user/post/5 where 5 is the id of the user and send a GET request.
Try it yourself - test the endpoint /post/all and check if you get all the posts.
Frequently Asked Questions
What does Spring Boot's post method do?
The Spring Boot applications handle the post request performed by the client with the JSON data in the header area where the PostMapping () annotation is most frequently used. The project's Spring web is being initialized.
What is the POST API's operation?
To build or edit resources in web services, POST requests are used to submit data to the API server. In the request body of an HTTP request, the server stores the data that was delivered to it. A website's contact form serves as the most basic illustration.
What distinguishes the REST and SOAP APIs from one another?
REST is an architectural design approach, whereas SOAP is a protocol. A service interface is used by SOAP, whereas URIs are used by REST for an API, which is meant to expose certain portions of an application's business logic on a server.
I want to use the REST API, but how do I POST a request?
Sending an HTTP POST request to the REST API server and including JSON data in the body of the POST message are required steps in posting JSON to a REST API endpoint. Using the Content-Type: application/json request header, you must specify the data type in the body of the POST message.
Is it possible to update data using the POST method?
To update a resource, you can use POST, but not with the same URL as the resource you're changing.
In the REST, is it possible to use "Put" instead of "POST"?
POST would be applied to a list of questions if you wanted to utilize it. The PUT command would be used for a specific query if you wanted to utilize it.
Conclusion
This article demonstrates how to create a Post for a User by implementing the POST serviceby Spring Boot to produce a post for users in Spring
If you think this blog has helped you enhance your knowledge about the above question, and if you want to learn more, check out our articles. And many more on our website.
Visit our website to read more such blogs. Make sure you enroll in our courses, take mock tests, solve problems, and interview puzzles. Also, you can pay attention to interview stuff- interview experiences and an interview bundle for placement preparations. Do upvote our blog to help fellow ninjas grow.


 8+ registered

