Table of contents
1.
Introduction
2.
What is a Many-to-one Relationship?
3.
Main Implementation
3.1.
Step 1:  Creating data Entities
3.2.
Step 2: Connecting the services to use JPA
3.3.
Step 3: Creating controllers to access the service 
3.4.
Step 4: Running the service.
4.
Frequently Asked Questions 
4.1.
What are getters and setters? 
4.2.
Why do we add @entity annotation in Post? 
4.3.
What is Java Persistence API?
4.4.
Why is the @ManyToOne annotation added? 
4.5.
Which point should the user take care of while generating toString()?
5.
Conclusion
Last Updated: Mar 27, 2024
Medium

Creating Post Entity and Many to One Relationship with User Entity

Author Geetika Dua
0 upvote
Career growth poll
Do you think IIT Guwahati certified course can help you in your career?

Introduction

REST is an abbreviation for REpresentational State Transfer. The main idea of restful web services is to make web services adequate. RESTful web services handle the services using their concepts which are already present in HTTP.

Intro image

Let us first look at the various methods in HTTP-

GET-  The GET method is responsible for reading the resource.
PUT- The PUT method updates the resource that already exists.
POST- The POST method creates a new resource.
DELETE- The DELETE method simply deletes the resource.

What is a Many-to-one Relationship?

Many-to-one relationship relates a collection of entities to a similar entity. Therefore, more than one row in relational databases can link to another entity's similar row.

many to one

Main Implementation

Step 1:  Creating data Entities

  • Create User and Post class and @Entity annotation to represent these as a model/entity.
  • Add getters and setters to the User and Post class.
  • Add toString() method to the User and Post class. (Optional but better to have)
     

User.java

package com.example.codingninjas;
import javax.persistence.*;
@Entity
public class User {
 @Id
 @GeneratedValue(strategy= GenerationType.AUTO)
 private Integer id;
 private String firstName;
 private String lastName;
 private String email;
 private String address;
 //default constructor
 protected User() {
 }
 public User(Integer id, String firstName, String lastName, String email, String address) {
     super();
     this.id = id;
     this.firstName = firstName;
     this.lastName = lastName;
     this.email = email;
     this.address = address;
 }

 public Integer getId() {
     return id;
 }

 public void setId(Integer id) {
     this.id = id;
 }

 public String getFirstName() {
     return firstName;
 }

 public void setFirstName(String firstName) {
     this.firstName = firstName;
 }

 public String getLastName() {
     return lastName;
 }

 public void setLastName(String lastName) {
     this.lastName = lastName;
 }

 public String getEmail() {
     return email;
 }
 public void setEmail(String email) {
     this.email = email;
 }
 public String getAddress() {
     return address;
 }
 public void setAddress(String address) {
     this.address = address;
 }
 @Override
 public String toString() {
     return String.format("User [id=%s, firstName=%s, lastName=%s email=%s address=%s]", id, firstName, lastName, email, address);
 }
}
You can also try this code with Online Java Compiler
Run Code


Post.java

package com.example.codingninjas;

import javax.persistence.*;

@Entity
public class Post {

  @Id
  @GeneratedValue(strategy = GenerationType.AUTO)
  private Integer id;

  private String content;

  @ManyToOne(targetEntity = User.class)
  @JoinColumn(name = "userId")
  private User user;

  protected Post() {
  }

  public Post(String content, User user) {
      this.content = content;
      this.user = user;
  }

  public Integer getId() {
      return id;
  }

  public void setId(Integer id) {
      this.id = id;
  }

  public String getContent() {
      return content;
  }

  public void setContent(String content) {
      this.content = content;
  }

  public User getUser() {
      return user;
  }

  public void setUser(User user) {
      this.user = user;
  }

  @Override
  public String toString() {
      return String.format("Post [id=%s, description=%s]", id);
  }


}
You can also try this code with Online Java Compiler
Run Code


@ManyToOne annotation indicates that a user can do many posts. The relationship between post and user is many-to-one. 

Step 2: Connecting the services to use JPA

  • Create UserRepository and PostRepository classes.
  • Let UserRepository extend JpaRepository<User, Integer>.
  • Let PostRepository extend JpaRepository<User, Integer>.


You will have to specify the entity that needs to be managed by JPARepository in <>.

UserRepository.java

package com.example.codingninjas;

import org.springframework.data.jpa.repository.JpaRepository;

public interface UserRepository extends JpaRepository<User, Integer> {

}
You can also try this code with Online Java Compiler
Run Code


PostRepository.java

package com.example.codingninjas;

import org.springframework.data.jpa.repository.JpaRepository;

public interface PostRepository extends JpaRepository<Post, Integer> {

}
You can also try this code with Online Java Compiler
Run Code

Step 3: Creating controllers to access the service 

  • Create a UserController.class and add the following endpoints

    • /addUser: to add a new user
       
    • /user/all: to get all the users
       
  • Create a PostController.class and add the following endpoints.

    • /addPost: to add the post
       
    • /post/all: to get all the posts 
       

UserController.class

package com.example.codingninjas;

import org.springframework.beans.factory.annotation.Autowired;
import org.springframework.http.ResponseEntity;
import org.springframework.web.bind.annotation.GetMapping;
import org.springframework.web.bind.annotation.PostMapping;
import org.springframework.web.bind.annotation.RequestBody;
import org.springframework.web.bind.annotation.RestController;

import java.util.List;

@RestController
public class UserController {
  @Autowired
  private UserRepository userRepository;

  @PostMapping(path = "/addUser")
  public ResponseEntity<User> addNewUser(@RequestBody User user) {
      User savedUser = userRepository.save(user);
      return ResponseEntity.ok().body(savedUser);
  }

  @GetMapping(path = "/user/all")
  public ResponseEntity<List<User>> getAllUsers() {
      return  ResponseEntity.ok().body(userRepository.findAll());
  }

}
You can also try this code with Online Java Compiler
Run Code


PostController.java

package com.example.codingninjas;

import org.springframework.beans.factory.annotation.Autowired;
import org.springframework.http.ResponseEntity;
import org.springframework.web.bind.annotation.GetMapping;
import org.springframework.web.bind.annotation.PostMapping;
import org.springframework.web.bind.annotation.RequestBody;

import java.util.List;


@RestController
public class PostController {
  @Autowired
  private PostRepository postRepository;

  @PostMapping(path = "/addPost")
  public ResponseEntity<Post> addNewUser(@RequestBody Post post) {

      Post savedPost = postRepository.save(post);
      return ResponseEntity.ok().body(savedPost);
  }

  @GetMapping(path = "/post/all")
  public ResponseEntity<List<Post>> getAllPosts() {
      return  ResponseEntity.ok().body(postRepository.findAll());
  }

}
You can also try this code with Online Java Compiler
Run Code

Step 4: Running the service.

  • Build and run the project
build and run


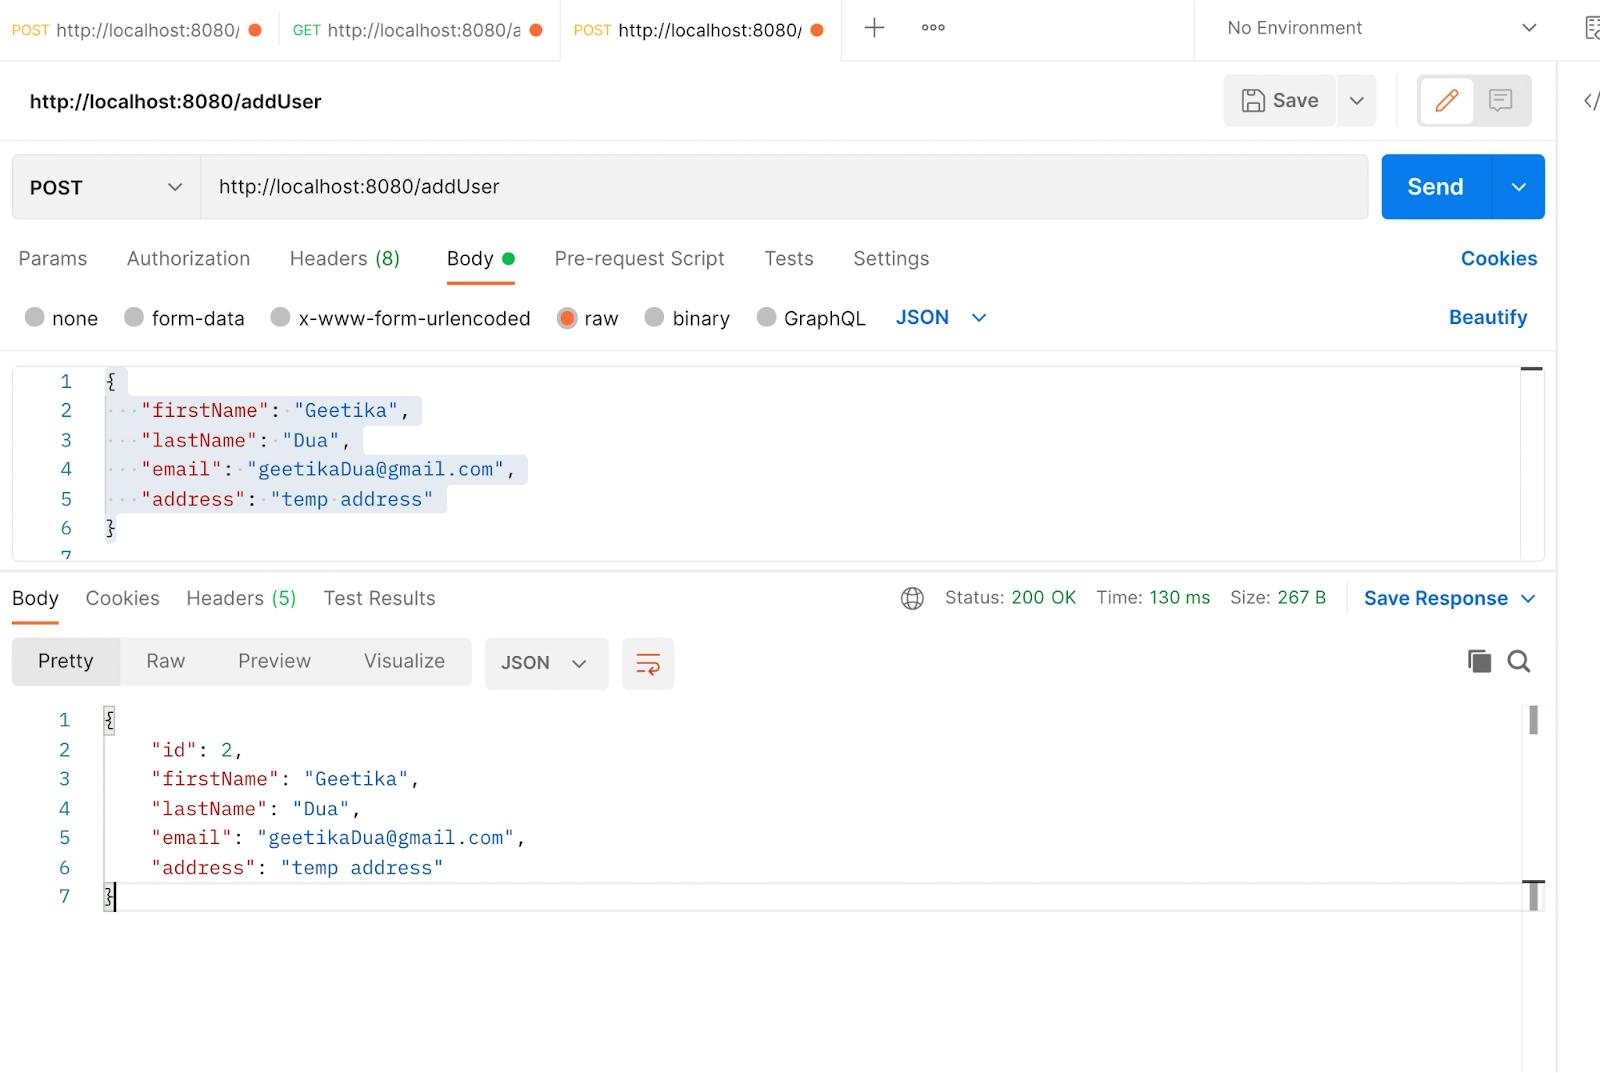
  • Open postman and add URL http://localhost:8080/addUser to add the user. Choose Post as HTTP method. Select body, then select raw and then select JSON from the dropdown. Add the following JSON and send the request. 

{
  "firstName": "Geetika",
  "lastName": "Dua",
  "email": "geetikaDua@gmail.com",
  "address": "temp address"
}
output
  • You can add more users in the similar way. To see if the user is saved or not in the new tab add the URL http://localhost:8080/user/all and HTTP method as GET and send the request.
http method get
sql query
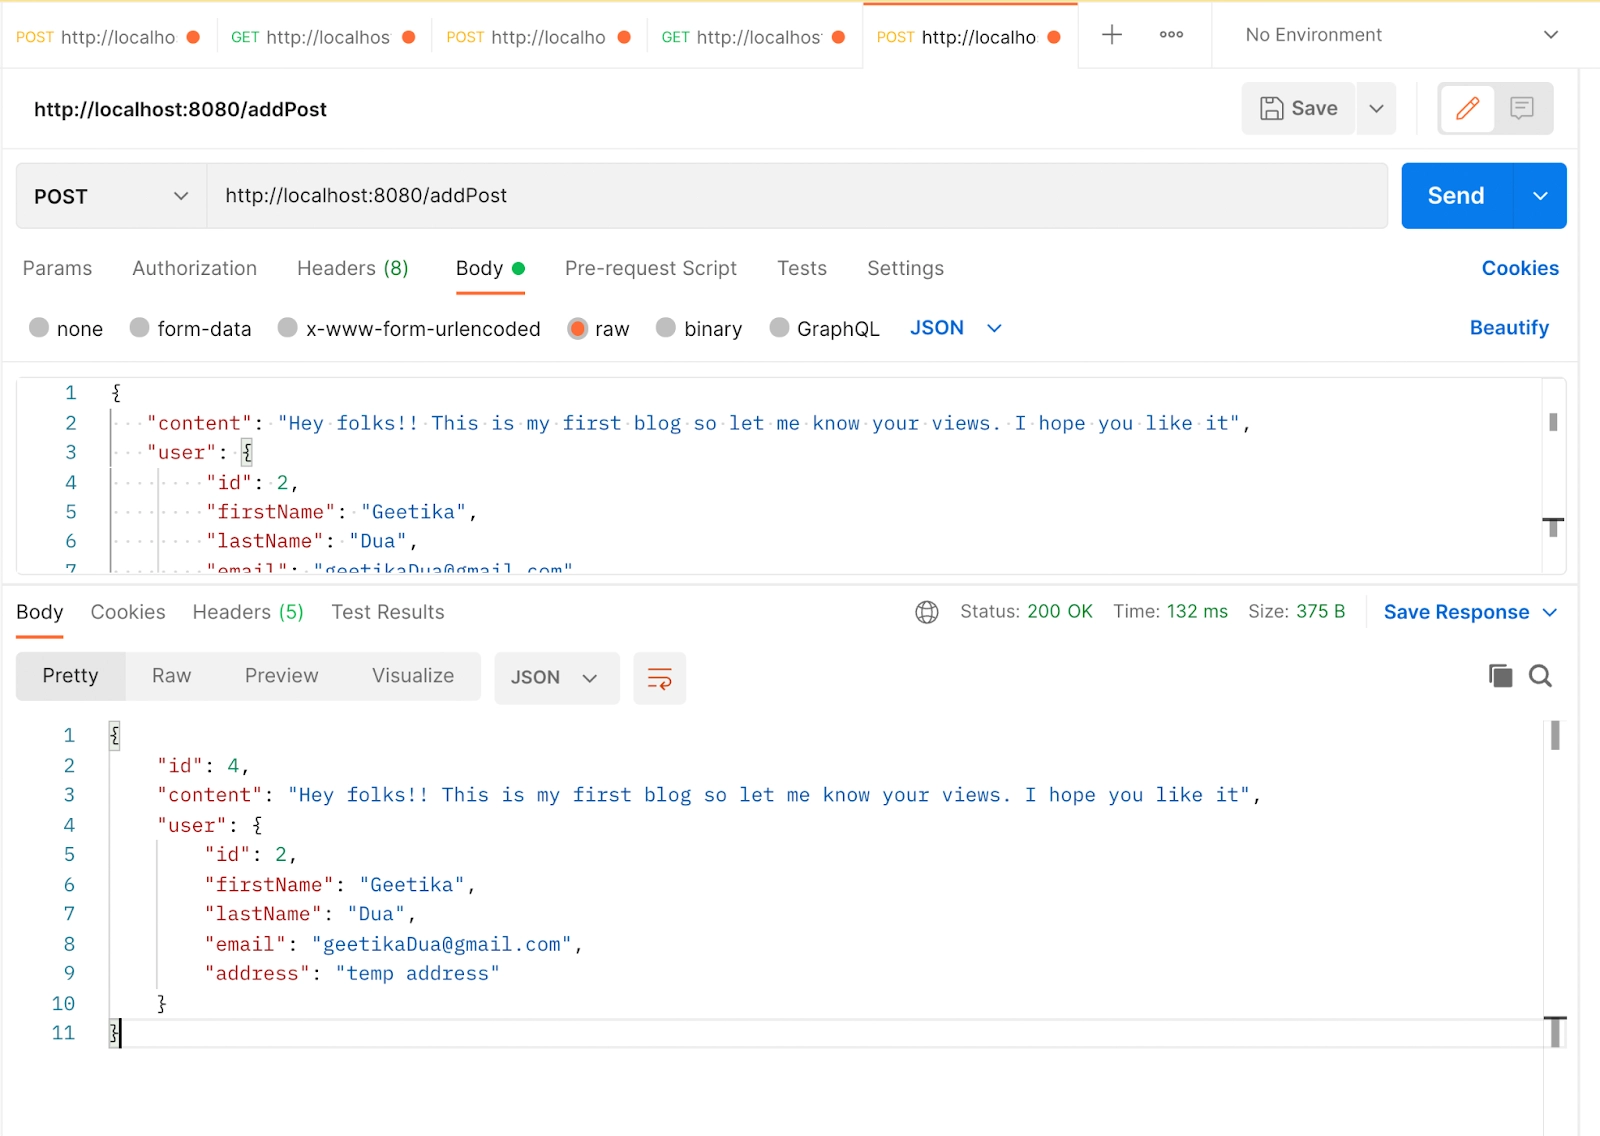
  • In the similar as we added user we will be adding the post of the user with following JSON data, URL = http://localhost:8080/addPost, HTTP method: POST
{
  "content": "Hey folks!! This is my first blog so let me know your views. I hope you like it",
  "user": {
       "id": 2,
       "firstName": "Geetika",
       "lastName": "Dua",
       "email": "geetikaDua@gmail.com",
       "address": "temp address"
   }
}
JSON data
navigating url
jpa output

Frequently Asked Questions 

What are getters and setters? 

Getters allow the user to get the information; they have a return type. Setters will enable the user to set the values. They can not return values.

Why do we add @entity annotation in Post? 

Post.java is an entity. That is why we add a @entity annotation.

What is Java Persistence API?

This API handles the way relational data is mapped to java objects. It ensures that the entity's state exists even after the application that uses it ends.

Why is the @ManyToOne annotation added? 

A user can have multiple posts, so it is vital to add a @ManyToOne annotation.

Which point should the user take care of while generating toString()?

The user should remember to uncheck the “user.”

Conclusion

In this blog, we studied the details of how to create a Post entity and many-to-one relationship with the User Entity.

For more information on Restful API and Spring boot articles, refer to-.

Refer to our guided paths on Coding Ninjas Studio to learn more about DSA, Competitive Programming, JavaScript, System Design, etc. Enroll in our courses and refer to the mock test and problems available. Take a look at the interview experiences and interview bundle for placement preparations.

Happy Coding!

Live masterclass