


Introduction
Rich Internet Applications are created using the JavaFX library. Applications built with this library will function consistently on various platforms. Applications developed using JavaFX can be used on multiple platforms, including desktop computers, mobile phones, TVs, tablets, and more. In this article, we will discuss the JavaFX ProgressBar.
The user can see the status of their work by using the progress bar. We will see it more in detail in this article.
JavaFX ProgressBar
A component of the JavaFX package is ProgressBar. It extends the ProgressIndicator, which appears like a horizontal bar. The task's progress is often shown by a progress bar.
The progress is set as a double value, with 0 denoting no progress and 1 denoting complete progress (task completed). The javafx.scene.control.ProgressBar class is used to represent the JavaFX ProgressBar control.
Constructors of the class
The two JavaFX ProgressBar Constructors are listed as follows:
1. ProgressBar(): Creates an intermediary ProgressBar.
// create a Progress
ProgressBar p = new ProgressBar();
2. ProgressBar(double d): A double d will be used as the progress indicator on a ProgressBar.
// create a ProgressBar
ProgressBar p = new ProgressBar(0);
Methods
Some commonly used methods are listed in the table below:

Programs to implement
Example 1
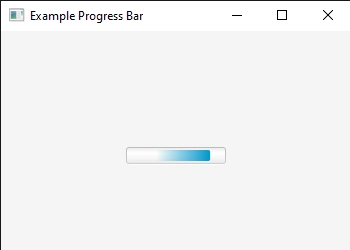
A simple program to generate the ProgressBar is shown below. In it, a basic ProgressBar is created and added to the scene.
ProgressBarFX.java
//package name
package progressbarfx;
import javafx.application.Application;
import javafx.scene.Scene;
import javafx.scene.control.ProgressBar;
import javafx.scene.layout.StackPane;
import javafx.stage.Stage;
public class ProgressBarFX extends Application {
public void start(Stage st) throws Exception {
//creating stackpane
StackPane sp = new StackPane();
//creating progress bar
ProgressBar pb = new ProgressBar();
sp.getChildren().add(pb);
//creating a scene
Scene sc = new Scene(sp,350,250);
//setting the scene
st.setScene(sc);
//setting the title
st.setTitle("Example Progress Bar");
//displaying the result
st.show();
}
//main method
public static void main(String[] args) {
launch(args);
}
}
Output:
Example 2
This program differs from the one above in that it uses a label in addition to the progress bar.
ProgressBarFX.java
//package name
package progressbarfx;
import javafx.application.Application;
import javafx.scene.Scene;
import javafx.scene.control.Label;
import javafx.scene.control.ProgressBar;
import javafx.scene.control.TextField;
import javafx.scene.layout.StackPane;
import javafx.event.ActionEvent;
import javafx.event.EventHandler;
import javafx.geometry.Pos;
import javafx.scene.layout.TilePane;
import javafx.stage.Stage;
public class ProgressBarFX extends Application {
public void start(Stage st) throws Exception {
// setting the title
st.setTitle("ProgressBar Example");

//creating the progress bar
ProgressBar pb = new ProgressBar();

// creating the tile pane
TilePane tp = new TilePane();

// label is created
Label text = new Label(" This is a progress bar!");
tp.getChildren().add(pb);
tp.getChildren().add(text);
Scene sc = new Scene(tp, 350, 200);
st.setScene(sc);
st.show();
}

//main method
public static void main(String[] args) {
launch(args);
}
}
Example 3
Before compiling the code, the user can also set the value in the progress bar. The value is set to 0.50 in this application, and as a result, the progress bar is displayed with 50% of the bar darkened. The darker area indicates that there has been 50% progress. The code for the same is given below.
ProgressBarFX.java
//package name
package progressbarfx;
import javafx.application.Application;
import javafx.scene.Scene;
import javafx.scene.control.Label;
import javafx.scene.control.ProgressBar;
import javafx.scene.control.TextField;
import javafx.scene.layout.StackPane;
import javafx.event.ActionEvent;
import javafx.event.EventHandler;
import javafx.geometry.Pos;
import javafx.scene.layout.TilePane;
import javafx.stage.Stage;
public class ProgressBarFX extends Application {
public void start(Stage st) throws Exception {
// setting the title
st.setTitle("ProgressBar Example")

//creating the progress bar
ProgressBar pb = new ProgressBar(0);

//value for progress bar is set
pb.setProgress(0.50);

// create a tile pane
TilePane tp = new TilePane();

// label used
Label text = new Label(" Showing a progress of 50% !!!!");
tp.getChildren().add(pb);
tp.getChildren().add(text);
Scene sc = new Scene(tp, 200, 100);
st.setScene(sc);
st.show();
}
//main method
public static void main(String[] args) {
launch(args);
}
}
Output:

Example 4
First, a button and progress bar are built. An event handler is used to set an action to forward the progress when the button is clicked. So, progress is made every time the button is pressed. The code for the same is given below:
ProgressBarFX.java
//package name
package progressbarfx;
import javafx.application.Application;
import javafx.scene.Scene;
import javafx.scene.control.*;
import javafx.scene.layout.*;
import java.io.*;
import javafx.event.ActionEvent;
import javafx.event.EventHandler;
import javafx.scene.control.Label;
import javafx.stage.Stage;
import java.net.*;
public class ProgressBarFX extends Application {
static double d =0;
public void start(Stage st) throws Exception {
// setting the title
st.setTitle("ProgressBar Example");

//creating the progress bar
ProgressBar pb = new ProgressBar(0);

// tile pane is created
TilePane t = new TilePane();

// action event is set
EventHandler<ActionEvent> eve = new EventHandler<ActionEvent>() {
public void handle(ActionEvent e)
{
// incrementing the progressbar
d += 0.1;
pb.setProgress(d);
}
};

// creating the button
Button btn = new Button("Move the progress bar!");

// setting the action
btn.setOnAction(eve);
t.getChildren().add(pb);
t.getChildren().add(btn);

//creating the scene
Scene sc = new Scene(t, 200, 100);

//setting the scene
st.setScene(sc);

//displaying the result
st.show();
}

//main method
public static void main(String[] args) {
launch(args);
}
}
Output:
Initially, the ProgressBar looks like this:

After incrementing a few times:

After continuous increment by clicking on the button:


 9+ registered

