


Introduction
Vaadin offers a comprehensive set of user interface components and the ability to define custom components.

🔥 Basic Components depicts the inheritance hierarchy of UI component classes and interfaces that are not directly bound to business objects.
🔥 Field Components display fields that are bound to a single value.
🔥 Components for Data Selection display a list of data and allow selection.
🔥 Layouts and Component Containers layouts and other component containers
Core elements of Vaadin

Core elements of Vaadin are user-friendly, easily understandable, and compatible with any modern browser.
Some core elements of Vaadin are as follows:
🌻 Upload
🌻 Split Layout
🌻 Icon
Let us learn more about these core elements of Vaadin in detail :-
Combo Box
A combo box is a selection component that allows the user to choose from a drop-down menu and the developer to create a drop-down for a specific field. The example below shows how to make a combo box. We'll be populating Planet history with the Vaadin combo box here.
package com.example.newapplication;

public class PlanetsName {

   private int id;
   private String name;

   public PlanetsName(){}
   public PlanetsName(int id, String name){
      this.id = id;
      this.name = name;
   }

   public int getId() {
      return id;
   }

   public void setId(int id) {
      this.id = id;
   }

   public String getName() {
      return name;
   }

   public void setName(String name) {
      this.name = name; 6. Vaadin – Core Elements
   }
}
Take a look at the code below and update MyUI.java accordingly.
package com.example.myapplication;

import java.util.ArrayList;
import java.util.Arrays;
import java.util.List;


import javax.servlet.annotation.WebServlet;
import com.vaadin.annotations.Theme;
import com.vaadin.annotations.VaadinServletConfiguration;
import com.vaadin.data.TreeData;
import com.vaadin.server.VaadinRequest;
import com.vaadin.server.VaadinServlet;
import com.vaadin.ui.ComboBox;
import com.vaadin.ui.Component;
import com.vaadin.ui.Label;
import com.vaadin.ui.MenuBar;
import com.vaadin.ui.MenuBar.MenuItem;
import com.vaadin.ui.Tree;
import com.vaadin.ui.UI;
import com.vaadin.ui.VerticalLayout;


@Theme("mytheme")
public class PlanetsUI extends UI {

   @Override
   protected void init(VaadinRequest vaadinRequest) {

      //VerticalLayout
      layout = new VerticalLayout();

      // List of planets
      List<PlanetsName> planets = new ArrayList();
      planets.add(new PlanetsName(1, "Mercury"));
      planets.add(new PlanetsName(2, "Venus"));
      planets.add(new PlanetsName(3, "Earth"));

      ComboBox<PlanetsName> select =
      new ComboBox<>("Select or Add a Planet");
      select.setItems(planets);

      // Use the name property for item captions
      select.setItemCaptionGenerator(PlanetsName::getName);

      //layout.addComponent(select);
      setContent(select);
   }
   @WebServlet(urlPatterns = "/*", name = "PlanetsUIServlet", asyncSupported = true)
   @VaadinServletConfiguration(ui = PlanetsUI.class, productionMode = false)

   public static class PlanetsUIServlet extends VaadinServlet {}
}
In the browser, the above code will produce the following results.

Date Picker
Another component that Vaadin supports is a date picker, which allows the developer to create a website easily. The code below demonstrates creating a date picker in the Vaadin UI. This has been deprecated in the most recent version of Vaadin 8, so we must use the Java date object to populate the date field. However, if you are using the Vaadin web project, you can continue to use it.
package com.TutorialsMy.DemoApp;
import java.io.File;
import java.io.FileOutputStream;
import java.io.OutputStream;
import java.time.LocalDate;
import java.util.Arrays;
import java.util.List;
import java.util.Locale;


import javax.servlet.annotation.WebServlet;
import com.vaadin.annotations.Theme;
import com.vaadin.annotations.VaadinServletConfiguration;
import com.vaadin.data.TreeData;
import com.vaadin.icons.VaadinIcons;
import com.vaadin.server.UserError;
import com.vaadin.server.VaadinRequest;
import com.vaadin.server.VaadinServlet;
import com.vaadin.shared.ui.ContentMode;


import com.vaadin.ui.AbsoluteLayout;
import com.vaadin.ui.Alignment;
import com.vaadin.ui.Button;
import com.vaadin.ui.CustomLayout;
import com.vaadin.ui.DateField;
import com.vaadin.ui.FormLayout;
import com.vaadin.ui.Grid;
import com.vaadin.ui.HorizontalLayout;
import com.vaadin.ui.HorizontalSplitPanel;
import com.vaadin.ui.Label;


import com.vaadin.ui.Notification;
import com.vaadin.ui.Panel;
import com.vaadin.ui.TabSheet;
import com.vaadin.ui.TextField;
import com.vaadin.ui.Tree;
import com.vaadin.ui.UI;
import com.vaadin.ui.Upload;
import com.vaadin.ui.Upload.Receiver;
import com.vaadin.ui.VerticalLayout;
import com.vaadin.ui.VerticalSplitPanel;
import com.vaadin.ui.Window;


@Theme("mytheme")
public class DemoUI extends UI {


   @Override
   protected void init(VaadinRequest vaadinRequest) {

      final VerticalLayout hLayout = new VerticalLayout();
      Label l1 = new Label("Enter Date\n",ContentMode.PREFORMATTED);

      DateField date = new DateField();
      date.setValue(LocalDate.now());
      date.setLocale(new Locale("en","IND"));

      hLayout.addComponents(l1,date);
      hLayout.setComponentAlignment(l1,Alignment.BOTTOM_CENTER);
      hLayout.setComponentAlignment(date,Alignment.BOTTOM_CENTER);

      setContent(hLayout);
   }

   @WebServlet(urlPatterns = "/*", name = "DemoUIServlet", asyncSupported = true)
   @VaadinServletConfiguration(ui = DemoUI.class, productionMode = false)

   public static class DemoUIServlet extends VaadinServlet {}
}
You can also use the Vaadin date picker class directly from Java, as shown below, to achieve the same result in the browser.
DatePicker datePicker = new DatePicker();
It should be noted that you must use Vaadin V 3.0 to use the DatePicker class.
Context Menu
The context menu feature assists the developer in representing the dependent list in the browser. This feature has been deprecated in the most recent version of Vaadin 8. You can do the same thing with the Menu bar option. You can use the code below to implement the same in your application. It is important to note that you must install the polymer using the npm directory and reference it in your HTML code.
<vaadin-context-menu>
   <template>
      <vaadin-list-box>
         <vaadin-item>First item</vaadin-item>
         <vaadin-item>Second item</vaadin-item>
      </vaadin-list-box>
   </template>

   <p>Context menu provided in the above template.</p>
   <p>Context menu that can be opened with <b>right click</b> or with <b>long touch.</b></p>

</vaadin-context-menu>
Because this is a Java tutorial, we recommend that you use the Menu bar option to learn the Vaadin Context menu.
Grid Data
A data grid is a list of data that is passed. In the browser, it behaves similarly to a tree. The example below demonstrates how a grid works.
Make the following class and name it MyCharArray.java.
package com.TutorialsMy.myApp;


public class MyCharArray {
   private String c;

   public String getC() {
      return c;
   }

   public void setC(String c) {
      this.c = c;
   }

   public MyCharArray(){}
   public MyCharArray(String ch){
      this.c = ch;
   }
}
Then, as shown below, modify the MyUI.java class.
package com.TutorialsMy.demoApp;
import java.io.File;
import java.io.FileOutputStream;
import java.io.OutputStream;
import java.util.Arrays;
import java.util.List;
import javax.servlet.annotation.WebServlet;
import com.vaadin.annotations.Theme;
import com.vaadin.annotations.VaadinServletConfiguration;
import com.vaadin.data.TreeData;
import com.vaadin.icons.VaadinIcons;
import com.vaadin.server.UserError;
import com.vaadin.server.VaadinRequest;
import com.vaadin.server.VaadinServlet;
import com.vaadin.shared.ui.ContentMode;
import com.vaadin.ui.AbsoluteLayout;
import com.vaadin.ui.Button;
import com.vaadin.ui.CustomLayout;
import com.vaadin.ui.FormLayout;
import com.vaadin.ui.Grid;
import com.vaadin.ui.HorizontalLayout;
import com.vaadin.ui.HorizontalSplitPanel;
import com.vaadin.ui.Label;
import com.vaadin.ui.Notification;
import com.vaadin.ui.Panel;
import com.vaadin.ui.TabSheet;
import com.vaadin.ui.TextField;
import com.vaadin.ui.Tree;
import com.vaadin.ui.UI;
import com.vaadin.ui.Upload;
import com.vaadin.ui.Upload.Receiver;
import com.vaadin.ui.VerticalLayout;
import com.vaadin.ui.VerticalSplitPanel;
import com.vaadin.ui.Window;
@Theme("mytheme")
public class DemoUI extends UI {
@Override
protected void init(VaadinRequest vaadinRequest) {
VerticalLayout layout = new VerticalLayout();
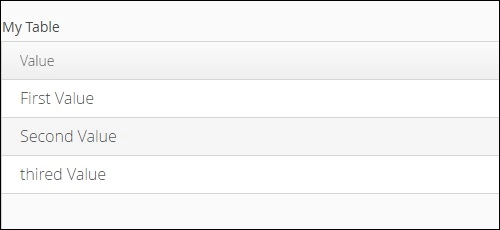
List<MyCharArray> values = Arrays.asList(
new MyCharArray("First Value"),
new MyCharArray("Second Value"),
new MyCharArray("thired Value"));
final Grid<MyCharArray> grid = new Grid<>("Table");
grid.setItems(values);
grid.addColumn(MyCharArray::getC).setCaption("Value");
layout.addComponent(grid);
setContent(layout);
}
@WebServlet(urlPatterns = "/*", name = "DemoUIServlet", asyncSupported = true)
@VaadinServletConfiguration(ui = DemoUI.class, productionMode = false)
public static class DemoUIServlet extends VaadinServlet {}
}
The above code will give the following output in the browser.
Upload
The upload content will assist the user in uploading files to the server. It has two modes, immediate and non-immediate, controlled by the Vaadin core framework. In immediate mode, the upload displays a file name entry box and a file selection button. In non-immediate mode, the user must initiate the upload by pressing the upload button.
Split Layout

Vaadin offers a variety of tools for web page design based on the developer's preferences. We can customize the entire screen to our liking using a split layout. The following example demonstrates various ways to split a layout using the Vaadin core component.
Change the MyUI.java file as shown below.
package com.TutorialsMy.demoApp;

import java.io.File;
import java.io.FileOutputStream;
import java.io.OutputStream;
import java.util.Arrays;
import java.util.List;


import javax.servlet.annotation.WebServlet;
import com.vaadin.annotations.Theme;
import com.vaadin.annotations.VaadinServletConfiguration;
import com.vaadin.icons.VaadinIcons;
import com.vaadin.server.UserError;
import com.vaadin.server.VaadinRequest;
import com.vaadin.server.VaadinServlet;
import com.vaadin.shared.ui.ContentMode;


import com.vaadin.ui.AbsoluteLayout;
import com.vaadin.ui.Button;
import com.vaadin.ui.CustomLayout;
import com.vaadin.ui.FormLayout;
import com.vaadin.ui.Grid;
import com.vaadin.ui.HorizontalLayout;
import com.vaadin.ui.HorizontalSplitPanel;
import com.vaadin.ui.Label;
import com.vaadin.ui.Notification;
import com.vaadin.ui.Panel;


import com.vaadin.ui.TabSheet;
import com.vaadin.ui.TextField;
import com.vaadin.ui.Tree;
import com.vaadin.ui.UI;
import com.vaadin.ui.Upload;
import com.vaadin.ui.Upload.Receiver;
import com.vaadin.ui.VerticalLayout;
import com.vaadin.ui.VerticalSplitPanel;
import com.vaadin.ui.Window;


@Theme("mytheme")
public class DemoUI extends UI {
   @Override
   protected void init(VaadinRequest vaadinRequest) {

      // A 400x250 pixels size layout
      Panel panel = new Panel("Split Panel example");
      Panel ex = new Panel("My Splitpanel- horizontal ");

      // Have a horizontal split panel as its content
      HorizontalSplitPanel hsplit = new HorizontalSplitPanel();
      hsplit.addComponent(ex);
      panel.setContent(hsplit);
      setContent(hsplit);

      /* Panel ex1 = new Panel("My Splitpanel- vertical ");
      // Have a horizontal split panel as its content
      VerticalSplitPanel vsplit = new VerticalSplitPanel();
      hsplit.addComponent(ex1);
      panel.setContent(vsplit);
      setContent(vsplit);*/
   }

   @WebServlet(urlPatterns = "/*", name = "DemoUIServlet", asyncSupported = true)
   @VaadinServletConfiguration(ui = DemoUI.class, productionMode = false)

   public static class DemoUIServlet extends VaadinServlet {}
}Icon
Vaadin includes built-in icons that can be used for a variety of purposes. These icons have numerous advantages over images. They reduce code size and speed up compilation. The example below shows how to use this in Vaadin.
As shown below, update your DemoUI.java class.
package com.TutorialsMy.demoApp;


import java.io.File;
import java.io.FileOutputStream;
import java.io.OutputStream;
import java.util.Arrays;
import java.util.List;


import javax.servlet.annotation.WebServlet;
import com.vaadin.annotations.Theme;
import com.vaadin.annotations.VaadinServletConfiguration;
import com.vaadin.icons.VaadinIcons;
import com.vaadin.server.UserError;
import com.vaadin.server.VaadinRequest;
import com.vaadin.server.VaadinServlet;
import com.vaadin.shared.ui.ContentMode;


import com.vaadin.ui.AbsoluteLayout;
import com.vaadin.ui.Button;
import com.vaadin.ui.CustomLayout;
import com.vaadin.ui.FormLayout;
import com.vaadin.ui.Grid;
import com.vaadin.ui.HorizontalLayout;
import com.vaadin.ui.Label;
import com.vaadin.ui.Notification;
import com.vaadin.ui.Panel;
import com.vaadin.ui.TabSheet;
import com.vaadin.ui.TextField;
import com.vaadin.ui.UI;
import com.vaadin.ui.Upload;
import com.vaadin.ui.Upload.Receiver;
import com.vaadin.ui.VerticalLayout;
import com.vaadin.ui.Window;


@Theme("mytheme")
public class DemoUI extends UI {

   @Override
   protected void init(VaadinRequest vaadinRequest) {

      // A 400x250 pixels size layout
      VerticalLayout content = new VerticalLayout();
      Panel p = new Panel("Example of Vaadin Upload-");
      TextField name = new TextField("Name");
      name.setIcon(VaadinIcons.USER);
      content.addComponent(name);

      // Button allows specifying icon resources in the constructor
      Button ok = new Button("OK", VaadinIcons.CHECK);
      content.addComponent(ok);
      setContent(content);
   }

   @WebServlet(urlPatterns = "/*", name = "DemoUIServlet", asyncSupported = true)
   @VaadinServletConfiguration(ui = DemoUI.class, productionMode = false)

   public static class DemoUIServlet extends VaadinServlet {}
}This code will be executed in the browser and produce the output below.


 9+ registered

