Constructors of GWT CheckBox Widget🧑🏻💻
The GWT CheckBox comes equipped with various constructors. Let us discuss some of these in this section,
-
CheckBox(): This is the primary constructor for the creation of a CheckBox.
-
CheckBox(Element elm): This constructor is used by subclasses to use an existing element.
-
CheckBox(java.lang.String textLabel): This is used to create a checkBox with the given text label.
-
CheckBox(java.lang.String textLabel, boolean asHTML): This is used to create a checkBox with the provided text label and then set the content as HTML.
Methods of GWT CheckBox Widget🧑🏻💻
The GWT CheckBox also has various class methods. Let us look at the GWT CheckBox class methods,
-
int getTabIndex(): This method is used to fetch the position of the widget in the tab index.
-
void setTabIndex(int index): This method is used to set the position of the widget in the tab index.
-
java.lang.String getName(): This method fetches the name of the widget.
-
void setName(java.lang.String name): This method is used to set the name of the widget.
-
java.lang.String getText(): We can fetch the text of the object using the getText method.
-
void setText(java.lang.String text): We can set the text of the object using the setText method.
-
boolean isEnabled(): This returns true if the widget has been enabled.
-
boolean isChecked(): This returns true if the checkbox is checked.
-
protected void onLoad(): If the widget is attached to the browser's document, then this method is called.
-
protected void onUnLoad(): If the widget is detached from the browser's document, then this method is called.
-
void setAccessKey(char Key): This method is used to set the access key for the widget.
-
protected void replaceInputElement(Element element): We can use this method to replace the current element with another element.
-
void setChecked(boolean checked): This method is used to uncheck or check a given checkbox.
-
void setFocus(boolean focused): We can focus or unfocus a widget using this method.
-
void setEnabled(boolean enabled): We can set a widget as enabled using this method.
-
void setHTML(java.lang.String html): This method is used to set the content of an object using HTML.
-
java.lang.String getHTML(): This method is used to fetch the content of an object as HTML.
- void sinkEvents(int bitsToAdd): This method adds a group of events that need to be sunk by the object.
Inherited Methods🤘🏻
The GWT CheckBox class inherits the following Java classes,
- java.lang.Object
- com.google.gwt.user.client.ui.Widget
- com.google.gwt.user.client.ui.UIObject
- com.google.gwt.user.client.ui.FocusWidget
GWT CheckBox Widget Example💻
In this section, we will go through the simple steps to show the usage of the GWT checkbox widget. Here you need to modify files ‘GWTProjectOne.css’, ‘GWTProjectOne.gwt.xml’, ‘GWTProjectOne.html’, and ‘GWTProjectOne.java’ by changing the code with the below code.
The Eclipse IDE and file structure will look something like this -


GWTProjectOne.gwt.xml
<?xml version = "1.0" encoding = "UTF-8"?>
<module rename-to = 'gwtprojectone'>

  <!-- Let's inherit the core GWT things. -->
  <inherits name = 'com.google.gwt.user.User'/>

  <!-- Let's inherit the default Google Web Toolkit style sheet. -->
  <inherits name = 'com.google.gwt.user.theme.clean.Clean'/>

  <!-- Let's specify the application entry-point class. -->
  <entry-point class = 'coding.ninja.client.GWTProjectOne'/>

  <!-- Let's specify the souce paths for the translatable code. -->
  <source path = 'client'/>
  <source path = 'shared'/>

  <add-linker name="xsiframe"/>
  <set-configuration-property name="devModeRedirectEnabled" value="true"/>
  <!-- enable source maps -->
  <set-property name="compiler.useSourceMaps" value="true" />
</module>
GWTProjectOne.css
body {
  text-align: center;
  font-family: verdana, sans-serif;
}

h1 {
  font-size: 2em;
  font-weight: bold;
  color: orange;
  margin: 40px 0px 70px;
}

.gwt-CheckBox{
  color:blue;
}

.gwt-CheckBox-disabled {
  color:red;
}
GWTProjectOne.html
<!DOCTYPE html>
<html>
  <head>
    <meta http-equiv="content-type" content="text/html; charset=UTF-8">
    <link rel="stylesheet" href="GWTProjectOne.css">
    <script type="text/javascript" language="javascript" src="gwtprojectone/gwtprojectone.nocache.js"></script>
  </head>

  <body>
      <h1>Coding Ninjas CheckBox Widget</h1>
      <div id = "CodingContainer"></div>
  </body>
</html>
GWTProjectOne.java
package coding.ninja.client;

import com.google.gwt.core.client.EntryPoint;
import com.google.gwt.event.dom.client.ClickEvent;
import com.google.gwt.event.dom.client.ClickHandler;
import com.google.gwt.user.client.Window;
import com.google.gwt.user.client.ui.CheckBox;
import com.google.gwt.user.client.ui.RootPanel;
import com.google.gwt.user.client.ui.VerticalPanel;

public class GWTProjectOne implements EntryPoint {
public void onModuleLoad() {
      CheckBox checkBox1 = new CheckBox("Check Me Ninja!");
      CheckBox checkBox2 = new CheckBox("Check Me Ninja!");
      checkBox1.setValue(true);
      checkBox2.setEnabled(false);

      checkBox1.addClickHandler(new ClickHandler() {
        @Override
        public void onClick(ClickEvent event) {
            CheckBox checkBox = (CheckBox)event.getSource();
            Window.alert("The checkBox is " +(checkBox.getValue() ? "" : "not") + " checked!!");
        }
      });

      VerticalPanel panel = new VerticalPanel();
      panel.setSpacing(10);
      panel.add(checkBox1);
      panel.add(checkBox2);

      RootPanel.get("CodingContainer").add(panel);
  }
}

You can also try this code with Online Java Compiler
After modifying all the files, right-click the project, go to GWT and then select compile button, and then you will see one dialog box where you have again click on compile button.


And after clicking it, you will see the following output in the console.

Now click on the dropdown button of the run button and select the project you want to run that is, in our case, GWTProjectOne.

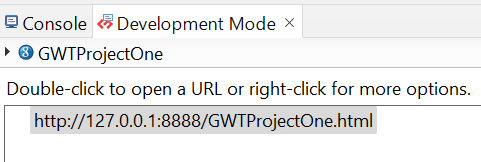
After clicking, you will see the following outputs in the console and development mode tab.

After clicking on the link in development mode, you will see the output of the code.
Output


We hope you have completely understood the GWT CheckBox Widget. 😁
Frequently Asked Questions
What is the google web toolkit?
GWT (Google web toolkit) is an open-source development toolkit provided by google for developing browser-based, complex Ajax applications.
What is an IDE?
IDE is an integrated development environment. It is a software application that provides comprehensive facilities to programmers for software development.
What is JDK?
JDK is a java development kit. It s the distribution of java technology by oracle corporation. It implements java virtual and Java language specifications.
What is the advantage of developing a web application in GWT?
We can develop GWT apps in Java, and the advantages of developing in Java are auto-complete, refactoring, debugging, code reuse, etc.
What are the tools used by Java for development?
Tools used y Java for development are Netbeans, Eclipse, JUnit, Maven, etc., which are also used for developing Rich Internet Applications.
Conclusion
In this blog, we went through GWT CheckBox Widget. We saw class declaration, CSS style rules, constructors, and inherited methods. At last, we will see an example of the GWT CheckBox Widget and if you would like to learn more, check out our articles on-
Refer to our guided paths on Coding Ninjas Studio to learn more about DSA, Competitive Programming, JavaScript, System Design, etc. Enroll in our courses and refer to the mock test and problems available. Take a look at the interview experiences and interview bundle for placement preparations.
Do upvote our blog to help other ninjas grow.

Happy Learning Ninja! 🥷


 9+ registered

