


Introduction
Hello and welcome, readers! We hope you are doing well.
Today, we will discuss the JavaFX Scroll Bar. The JavaFX Scroll Bar provides the user with a scroll bar to scroll down the application pages.
After completing this article, you will clearly understand the JavaFX Scroll Bar. So, without further ado, let’s jump into the article.
JavaFX ScrollBar
The scrollBar is used in the JavaFX application to scroll over a range of values. It is used to display lengthy page contents. ScrollBar in JavaFX requires javafx.scene.control. The ScrollBar class is employed.
ScrollBar class provide three methods named as:
- setMin()
- setMax()
-
setValue()
The setMin and setMax methods define the scroll bar's minimum and maximum values. The value of the scroll bar changes when the user moves the thumb. The setValue() is used to set the current value of the scrollBar. We can set up any scrollbar's orientation in JavaFX with the help of setOrientation() and pass the Orientation.VERTICAL property into the method as an argument.
To scroll by a unit increment, the user can click the left or right button (down or up for vertical orientation). When a button is clicked, the unit increment property specifies the amount by which the scroll bar is adjusted. Another possibility is to click within the track by a block increment. The block increment property specifies how much the scroll bar is adjusted when the bar's track is clicked.
A scroll bar has four areas:
- thumb
- right button or down button
- left buttons or up buttons
- track
To create the ScrollBar in JavaFX, we must first import all of the necessary libraries, such as javafx.application.Application, javafx.scene.Scene, javafx.stage.Stage, javafx.scene.control.ScrollBar, javafx.scene.layout.StackPane. In the next section, we will see the implementation of a ScrollBar in JavaFX.
Implementation
To implement the demo application, we need to follow the steps below.
- Create a demo project in any IDE that supports Java Web applications, such as NetBeans. Choose File, then New Project from the NetBeans IDE Main menu.
- Select the web application project type from the Java with Maven category.
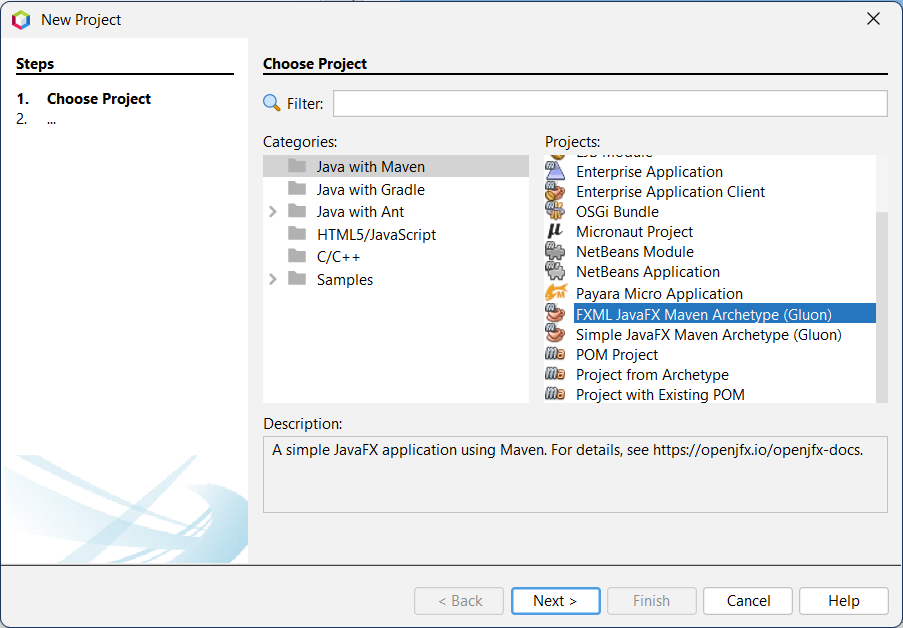
- Choose FXML JavaFX Maven Archetype and pick any practical name for your project and packages.
- Choose Java EE 7 for the web and the GlassFish Server.
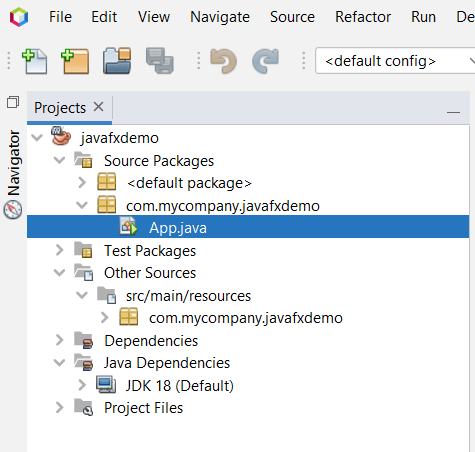
- Modify the "App.Java" file on the project folder, as shown in the image below.
- Compile and execute the application to see if it is being compiled in the previously configured environment.
-
Create the web application and deploy it as a war file via the GlassFish server. After execution, the program's output should be displayed in the default browser window.
Folder Structure
As previously stated, the folder structure should resemble the image below.
Code
package com.mycompany.javafxdemo;

import javafx.application.Application;
import javafx.scene.Scene;
import javafx.scene.layout.StackPane;
import javafx.stage.Stage;
import javafx.scene.control.ScrollBar;

public class App extends Application {
    @Override
    //launch the app that we just created
    public void start(Stage mainStage) throws Exception {
        ScrollBar s = new ScrollBar();
        StackPane root = new StackPane();
        root.getChildren().add(s);
        Scene scene = new Scene(root,350,250);
        mainStage.setScene(scene);
        mainStage.setTitle("ScrollBar Demonstration");
        mainStage.show();
   }
   public static void main(String args[]){
      launch(args);
   }
}
Output


 9+ registered

