Constructors of JLayeredPane 📖
We have only one constructor of JLayeredPane-
- JLayeredPane() - This is the only constructor JLayeredPane has which creates a JLayeredPane.
Layers of JLayeredPane
Following are some of the layers of JLayeredPane-
-
DEFAULT_LAYER: This layer is the bottommost and standard layer where most components are inserted.
-
MODAL_LAYER: We use this layer for model dialogs, shown above the palette layer.
-
DRAG_LAYER: Above the popup layer, a component is shown in this type of layer while dragging it. When the dragging is finished, the component is shown in its original layer.
-
POPUP_LAYER: we use this type of layer of JLayeredPane for showing popup windows above the modal layer.
- PALETTE_LAYER: This layer sits over the default layer, which is useful for floating pallets and toolbars.
Methods of JLayeredPane 📝
After learning about the only type of constructors of JLayeredPane, we will now study about methods of JLayeredPane that form the basis of JLayeredPane in java.

-
protected void addImpl(Component comp, Object constraints, int index): We use this method to add a component to the container at a specified index. Also, for adding the specified component to this container's layout using the specified constraints, object LayoutManager is notified. For this addLayoutComponent method is used.
-
public static void putLayer(JComponent c, int layer): We use this method to set a layer for JComponent. No side effects are caused by this method like adding, painting, removing, etc. And for having these side effects, you can use the setLayer() method.
-
public static int getLayer(JComponent c): The layer attribute of the specified JComponent is returned y this method.
-
public void removes (int index): We use this method to remove a component from the pane's specified index.
-
public void removeAll(): This method removes all the components from the pane.
-
public void setLayer(Component c, int layer, int position): The layer attribute of the specified component and the component's position in that layer is set by this method.
-
public boolean isOptimizedDrawingEnabled(): This method makes optimized drawing invisible if layers in the pane overlap and return false. Otherwise returns true.
-
public static JLayeredPane getLayeredPaneAbove(Component c): the first JLayeredPane, which contains the specified component, is returned by this method, or this method returns null if no JLayeredPane is found.
-
public void setLayer(Component c, int layer): The JLayeredPane attribute of the specified component is set by this method. In the specified layer, this method makes the component bottommost.
- public int getLayer(Component c): The layer attribute of the specified Component is returned by this method.
Example of JLayeredPane👩🏻🏫
Here we will see the example of JLayeredPane in java.
Here we have used IntelliJ IDE. You can use whatever you wish. 😁
Open your IDE and copy-paste the following code into the java file you created like this. For example, we have written the code in the 'swingcn.java' file -

Code
import java.awt.Color;
import javax.swing.JButton;
import javax.swing.JFrame;
import javax.swing.JLayeredPane;
public class swingcn
{
   public static void main(String[] args)
   {
       JFrame frame = new JFrame("Coding Ninjas JLayeredPane");
       frame.setDefaultCloseOperation(JFrame.EXIT_ON_CLOSE);
       frame.setSize(520, 530);

       JLayeredPane jLayeredPane = new JLayeredPane();

       JButton jButton1 = new JButton("Open first layer box");
       jButton1.setBackground(Color.orange);
       jButton1.setBounds(175, 50, 150, 100);

       jLayeredPane.add(jButton1, JLayeredPane.DEFAULT_LAYER);

       JButton jButton2 = new JButton("Open second layer box");
       JButton jButton3 = new JButton("Close second layer box");
       jButton2.setVisible(false);
       jButton3.setVisible(false);
       jButton2.setBackground(Color.yellow);
       jButton3.setBackground(Color.yellow);
       jButton2.setBounds(100, 250, 180, 150);
       jButton3.setBounds(270, 250, 180, 150);

       jLayeredPane.add(jButton2, JLayeredPane.PALETTE_LAYER);
       jLayeredPane.add(jButton3, JLayeredPane.PALETTE_LAYER);

       JButton jButton4 = new JButton("Open third layer box");
       JButton jButton5 = new JButton("Close third layer box");
       jButton4.setVisible(false);
       jButton5.setVisible(false);
       jButton4.setBackground(Color.pink);
       jButton5.setBackground(Color.pink);
       jButton4.setBounds(100, 250, 180, 150);
       jButton5.setBounds(270, 250, 180, 150);

       jLayeredPane.add(jButton4, JLayeredPane.MODAL_LAYER);
       jLayeredPane.add(jButton5, JLayeredPane.MODAL_LAYER);

       JButton jButton6 = new JButton("Open fourth layer box");
       JButton jButton7 = new JButton("Close fourth layer box");
       jButton6.setVisible(false);
       jButton7.setVisible(false);
       jButton6.setBackground(Color.green);
       jButton7.setBackground(Color.green);
       jButton6.setBounds(75, 275, 150, 100);
       jButton7.setBounds(275, 275, 150, 100);

       jLayeredPane.add(jButton6, JLayeredPane.POPUP_LAYER);
       jLayeredPane.add(jButton7, JLayeredPane.POPUP_LAYER);

       JButton jButton8 = new JButton("Close last layer box");
       jButton8.setVisible(false);
       jButton8.setBackground(Color.decode("#C3B1E1"));
       jButton8.setBounds(175, 350, 150, 100);

       jLayeredPane.add(jButton8, JLayeredPane.DRAG_LAYER);

       frame.add(jLayeredPane);
       frame.setVisible(true);

       jButton1.addActionListener(e ->
       {
           jButton2.setVisible(true);
           jButton3.setVisible(true);
       });

       jButton2.addActionListener(e ->
       {
           jButton4.setVisible(true);
           jButton5.setVisible(true);
       });

       jButton3.addActionListener(e ->
       {
           jButton2.setVisible(false);
           jButton3.setVisible(false);
       });

       jButton4.addActionListener(e ->
       {
           jButton6.setVisible(true);
           jButton7.setVisible(true);
       });

       jButton5.addActionListener(e ->
       {
           jButton4.setVisible(false);
           jButton5.setVisible(false);
       });

       jButton6.addActionListener(e ->
       {
           jButton8.setVisible(true);
       });

       jButton7.addActionListener(e ->
       {
           jButton6.setVisible(false);
           jButton7.setVisible(false);
       });

       jButton8.addActionListener(e ->
       {
           jButton8.setVisible(false);
       });
   }
}

You can also try this code with Online Java Compiler
Explanation
Above is the code we have implemented to show different layers of JLayeredPane and how we can insert and remove components from the pane.
-
Firstly we have created a frame and then added a JLayeredPane to it.
-
Now we have added different buttons in different layers of the JLayeredPane.
- And we have attached an action listener to the buttons of every layer, too, for showing or hiding the next layer.
Output
Now right click and click on the run button to see the output.

After clicking on the open box you will see the following output-
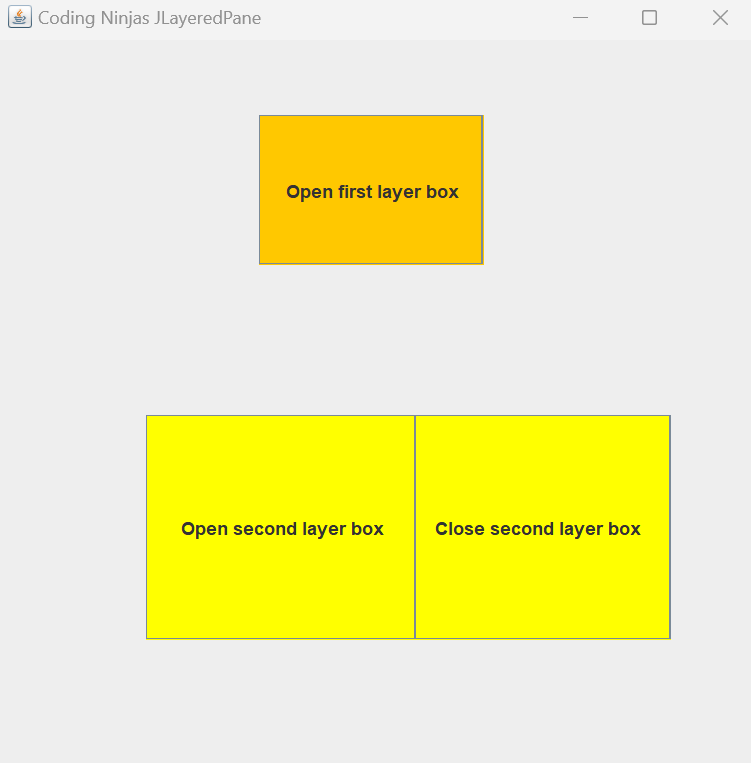
Again after clicking on the open box, you will see the following output where the third layer will open and so on-


Similarly, clicking on the close box will close the corresponding layer in which it lies.
Read also Swing component in java
Frequently Asked Questions🤔
What is Java?
Java is a class-based, high-level, object-oriented programming language with as many implementation dependencies as possible.
What is JLayeredPane In Java?
For adding the depth to the swing container, we use JLayeredPane class. We use this class to provide a third dimension for positioning the components and dividing the depth range into several layers. Here, the component in the lower layer is covered by the component in the upper layer.
JLayeredPane is a part of which package?
JLayeredPane is a part of the Java Swing package.
What is the swing package in java?
Swing packages in java provide classes of java swing APIs, for example, JLayeredPane, JRadioButton, JMenu, JColorChooser, JButton, JTextField, JLayeredPane, etc.
What is an ActionListener in java?
ActionListener is provided by java for determining where the user clicked on the screen, and accordingly, we generate an event to perform various tasks like print a value, calculation, etc.
Conclusion 🙋🏻♀️
We covered JLayeredPane In Java in this blog. Furthermore, we discussed the class declaration, layers, constructors, and methods of JLayeredPane In Java with an example and if you would like to learn more, check out our articles on-
Refer to our guided paths on Coding Ninjas Studio to learn more about DSA, Competitive Programming, JavaScript, System Design, etc. Enroll in our courses and refer to the mock test and problems available. Take a look at the interview experiences and interview bundle for placement preparations.
Do upvote our blog to help other ninjas grow.

Happy Learning Ninja! 🥷


 8+ registered

