Do you think IIT Guwahati certified course can help you in your career?
Introduction
OAuth stands for Open Authorization, and it is implemented to achieve a connection between online services. As per the official community site, it is an open protocol to allow secure authorization in a simple and standard method from web, mobile, and desktop applications.
The most common example of OAuth is the Sign in with Google button present on so many websites. The website service connects with the google service to provide us with a convenient option to authorize our resources to the service we want.
Let us help you learn about the integration of OAuth in Flask for the authentication of the user using Google, Instagram, and Facebook in our Flask application.
It provides support for remote method invocation to the restful APIs.
Terminologies in OAuth
Some of the usual terminologies used in OAuth in Flask are:
Client: The person or the application trying to connect to the other service.
Provider: The service to which the client connects.
AuthorizationURL: The URL provided by the provider to which the client sends requests.
Client ID and Secret: When the client sends the authorization request to the provider, this is the unique ID supplied by the provider.
Authorization Code: It's a code that the client gets once the user is successfully authenticated and delivered to the provider's authorization server.
Callback URL: The URL is set by the client to which the provider sends the authorization code.
OAuth Authentication in Flask – Connect to Google, Instagram, and Facebook
Here, we will build a Flask application that will use the OAuth protocol to fetch user information.
Steps to setup OAuth
Following are the steps to set up OAuth:
Step 1: Firstly, we need to register our application as a client on the website to provide us with the information. After that, we will receive the client credentials, including the client ID and client secret.
Step 2: Now, we will receive an authorization request to the provider's authorization URL from the client application.
Step 3: Afterward, the user needs toauthenticate themselves on the provider's site, and all the necessary rights need to be granted.
Step 4: The provider will send the authorization code to the client
Step 5: The client will send the authorization code to the provider's authorization server.
Step 6: At the end, the provider will send the client tokens that can be used to access user resources.
Necessary Installations
To get the required dependencies, type the below command in the terminal.
pip install -U Flask Authlib request
Getting the Credentials for Client from Providers
Google: Add http://localhost:5000/google/auth/ to Authorized redirect URIs after creating our Google OAuth Client https://console.cloud.google.com/apis/credentials.
Instagram: Create your Instagram Oauth 1.0 Client at https://developer.instagram.com/ by creating an app. Add http://localhost:5000/instagram/auth/ into Authorized redirect URIs.
Facebook: Create an app at https://developer.facebook.com/ to start your Facebook OAuth Client. Authorized redirect URIs should include http://localhost:5000/facebook/auth.
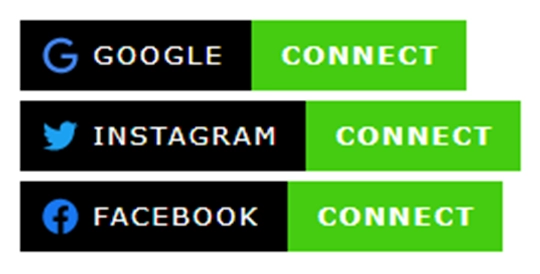
Creating the UI
Now we will create a folder called templates, and inside that, we will create a welcome.html file. It has a simple code that creates buttons for every provider.
What is the difference between OAuth and JWT? Ans. JWT is essentially a token format. JWT is a token that may be used as part of the OAuth authorization protocol. Server-side and client-side storage are used in OAuth. If we want to make a proper log-out, we'll need to use OAuth2.
What is an OAuth access token? Ans. The OAuth client's string to send requests to the resource server is known as an OAuth Access Token. Access tokens do not have to be in a certain format, and in fact, different OAuth servers use a variety of forms for their access tokens.
What is an OAuth authorization code? Ans. The authorization code is a one-time code that the client will use to obtain an access token. After a user has been authenticated, the code is acquired from the authorization server.
Key Takeaways
This article extensively discussed OAuth authentication and how OAuth in Flask is incorporated.
We hope this blog has helped you enhance your knowledge of the Open authentication through OAuth in Flask. For learning more about Templates in Flask, Cookies handling in Flask, and more, check out Code Studio's blog site. Do upvote our blog to help other ninjas grow. Happy Coding!


 9+ registered

