


Introduction 🧑🏻🎓
GWT (Google web toolkit) is an open-source development toolkit provided by google for developing browser-based, complex Ajax applications. We can even develop Rich Internet Applications (RIA) in Java using GWT, which will then be compiled into Javascript and cross-browser compliant.
Advantages of GWT🧐
-
Java script projects are hard to maintain compared to Java projects. But we need Javascript to run the RIA in the browser. So GWT combines both the above advantages.
-
GWT is almost similar to the swing package of Java and AWT.
- Each browser has its own set of problems; therefore, supporting all of them in the market is challenging. So, GWT solved this problem by creating optimized javascript code for each browser.
Limitations of GWT🤔
-
When Java is compiling into javascript to run on the browser, it will run only if enabled. Otherwise, it will not work.
-
Search engines do not index the web pages created by GWT since these web applications are generally dynamic.
-
If you have a UI designer who can create HTML pages, this will not work; hence you will need to implement whatever designer created again in GWT.
After going through everything about GWT, we will learn how to create an application in GWT.
Create an Application in GWT🎯
In GWT, we write code in java, but it runs in javascript. In this blog, we will use Eclipse IDE to demonstrate an example.
Create a Project
Using Eclipse IDE, we will create a GWT application project. Click on the GWT icon to launch the project wizard and go to “New GWT Application Project”. Now enter the name of the project as ‘GWTProjectOne’ as follows.

You can unselect the ‘Use Google App Engine’ option as we are not using it in our project and keep the other default values with ‘Generate Sample Project Code’ as checked. Now click on the finish button.
The file structure will look something like this after the project is created -

Update Files
Now next step is to modify files ‘GWTProjectOne.css’, ‘GWTProjectOne.gwt.xml’, ‘GWTProjectOne.html’, and ‘GWTProjectOne.java’ by changing the code with the below code.
GWTProjectOne.gwt.xml
<?xml version = "1.0" encoding = "UTF-8"?>
<module rename-to = 'gwtprojectone'>
  <!-- Let's inherit the core GWT things. -->
  <inherits name = 'com.google.gwt.user.User'/>

  <!-- Let's inherit the default Google Web Toolkit style sheet. -->
  <inherits name = 'com.google.gwt.user.theme.clean.Clean'/>

  <!-- Let's specify the application entry-point class. -->
  <entry-point class = 'coding.ninja.client.GWTProjectOne'/>

  <!-- Let's specify the source paths for the translatable code. -->
  <source path = 'client'/>
  <source path = 'shared'/>


  <add-linker name="xsiframe"/>
  <set-configuration-property name="devModeRedirectEnabled" value="true"/>
  <!-- enable source maps -->
  <set-property name="compiler.useSourceMaps" value="true" />
</module>
GWTProjectOne.css
body {
  text-align: center;
  font-family: Inter, sans-serif;
}

h1 {
  font-size: 1.5em;
  font-weight: bold;
  color: purple;
  margin: 50px 0px 50px;
}
GWTProjectOne.html
<!DOCTYPE html>
<html>
  <head>
    <meta http-equiv="content-type" content="text/html; charset=UTF-8">
    <link rel="stylesheet" href="GWTProjectOne.css">
    <script type="text/javascript" language="javascript" src="gwtprojectone/gwtprojectone.nocache.js"></script>
  </head>

  <body>
      <h1>Namaste Ninjas!</h1>
      <p>Welcome to Coding Ninjas first GWT application</p>
  </body>
</html>
GWTProjectOne.java
package coding.ninja.client;

import com.google.gwt.core.client.EntryPoint;
import com.google.gwt.user.client.Window;

public class GWTProjectOne implements EntryPoint {
public void onModuleLoad() {
      Window.alert("Namaste Ninjas!");
  }
}
Compile and Run
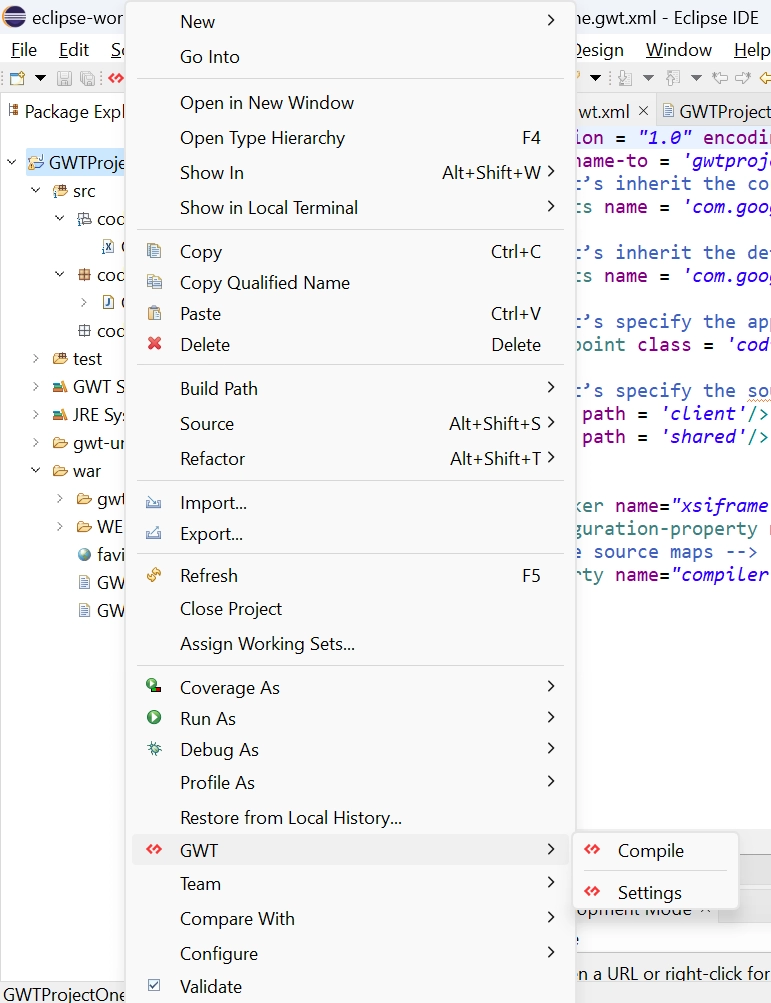
After modifying all the files, right-click the project, go to GWT and then select compile button, and then you will see one dialog box where you have again click on compile button.

And after clicking it, you will see the following output in the console.

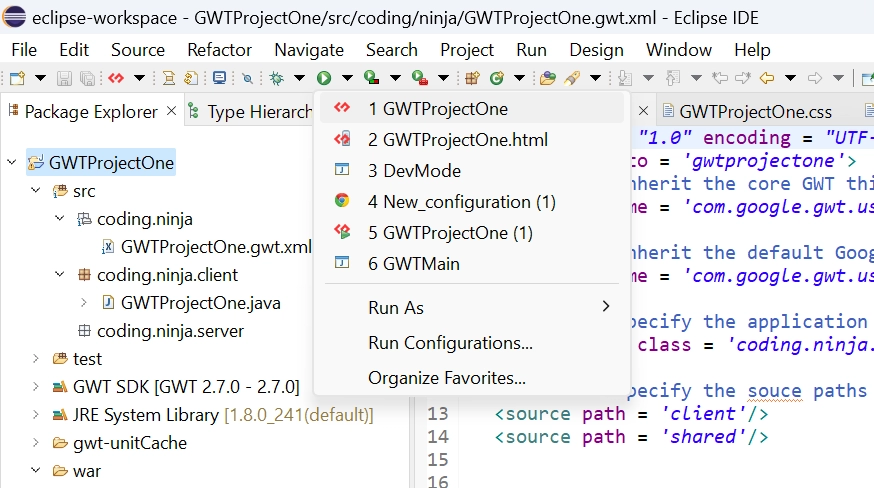
Now click on the dropdown button of the run button and select the project you want to run that is, in our case, GWTProjectOne.
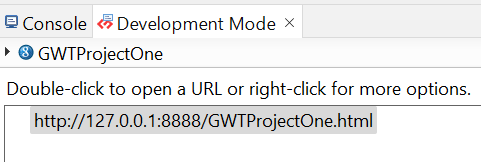
After clicking, you will see the following outputs in the console and development mode tab.

After double clicking on the link in development mode, you will see the output of the code.
Output


We hope you have completely understood how to create an application in GWT. 😁


 9+ registered

